Installation
Installing Boffo from the Google Marketplace is the simplest way to get Boffo, but it is currently only available as an “internal” Google Workspace add-on limited to Caltech Library staff. Users who are not members of the Caltech Library staff will have to use one of the alternate installation methods described below to get it either from the public Google Apps Script Project or the GitHub repository.
Using Google Marketplace
When you install Boffo from the Google Marketplace, the version of Boffo you get will remain fixed, even if new versions of Boffo become available, until you uninstall and reinstall the Boffo add-on. Consequently, the instructions below cover two cases: installing Boffo for the first time, and reinstalling Boffo to get a new version.
Installing Boffo for the first time
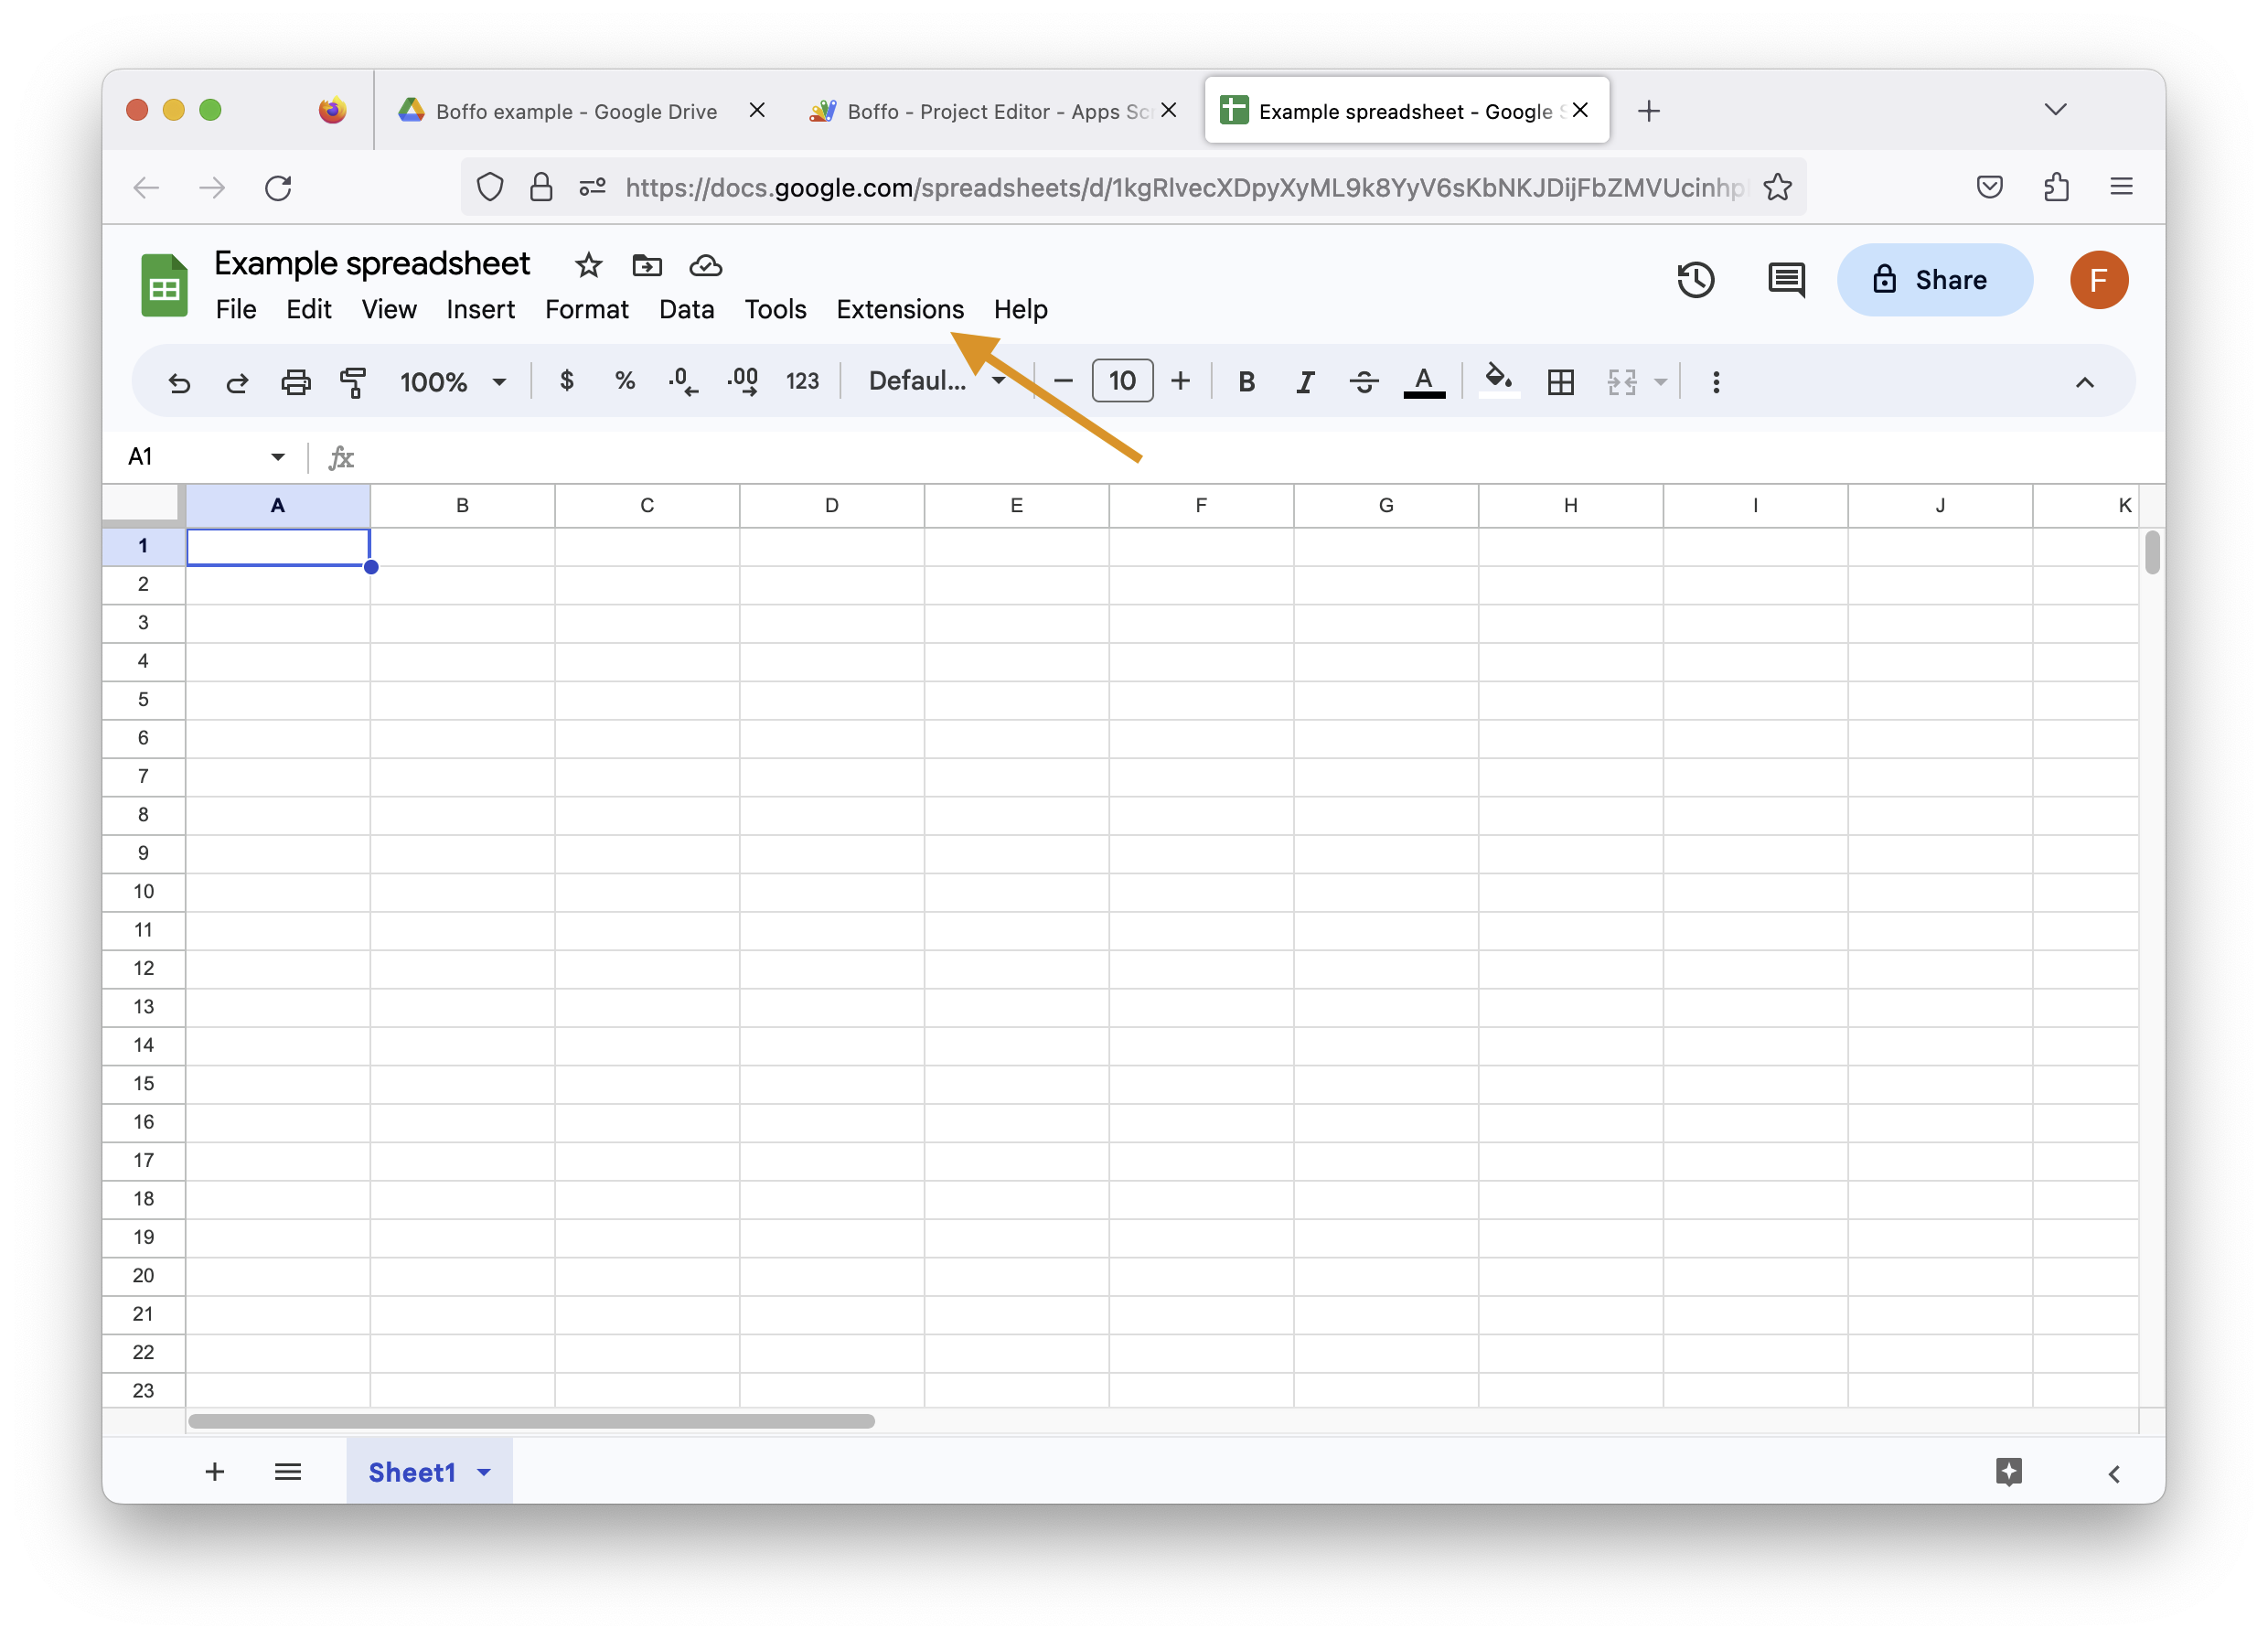
To install Boffo, look for the Extensions menu at the top of your Google sheet, click on it, then click on the item Get add-ons from the Add-ons submenu:

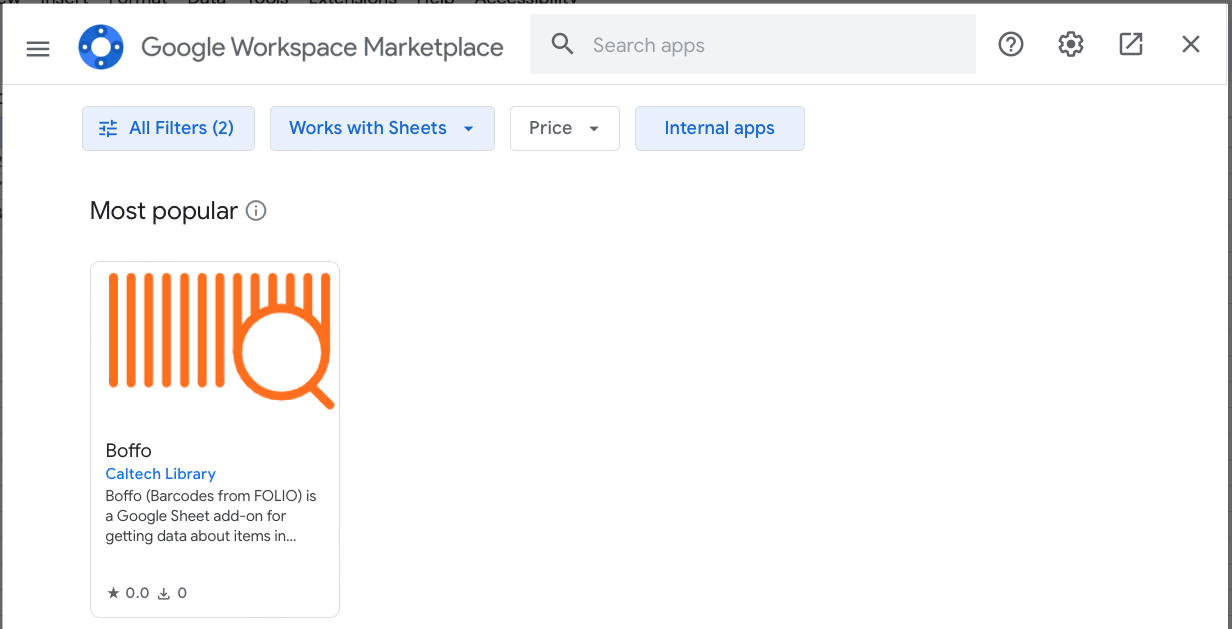
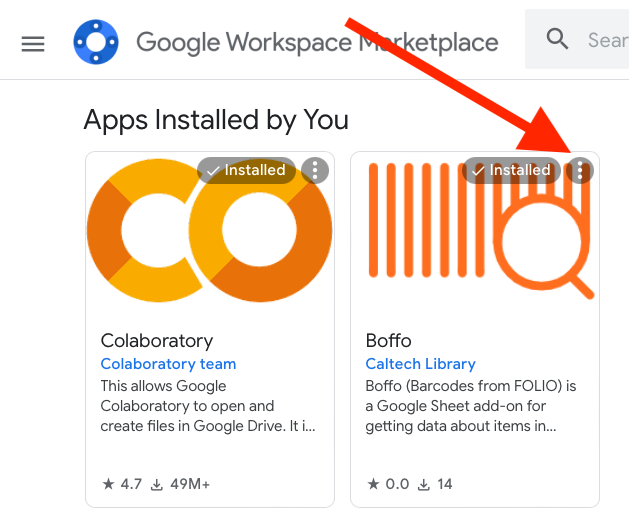
In the Google Workspace Marketplace panel that is shown next, click on the button titled Internal apps near the top:

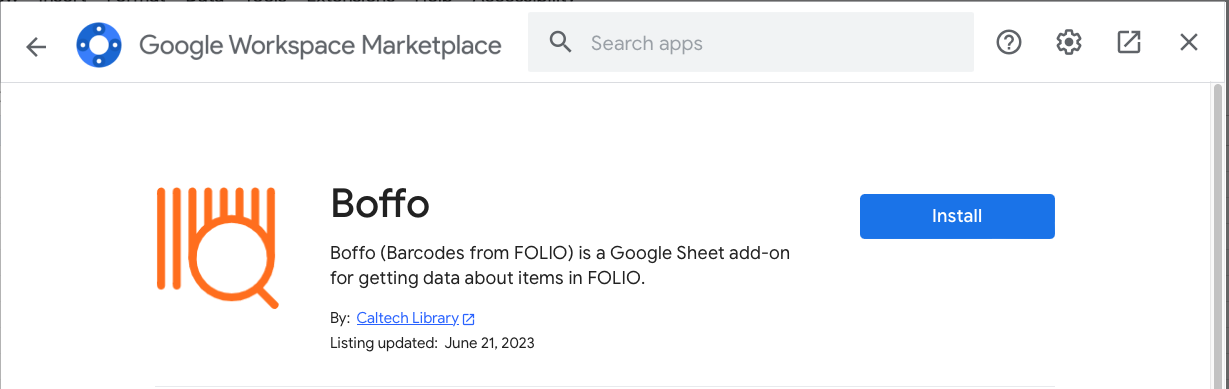
This will change the panel to show apps available for the Caltech Library staff. Boffo should be visible there. Click on the item for Boffo,
which will make the Google panel show more details about Boffo and a blue Install button:
Click on the Install button. Google will show you several dialogs asking for your permission to install Boffo. Accept and allow the installation, then close the Google Marketplace panel.
Note: after you install Boffo as an add-on in a Google Sheet, Google will show a dialog titled “Boffo has been installed!” that looks like this:
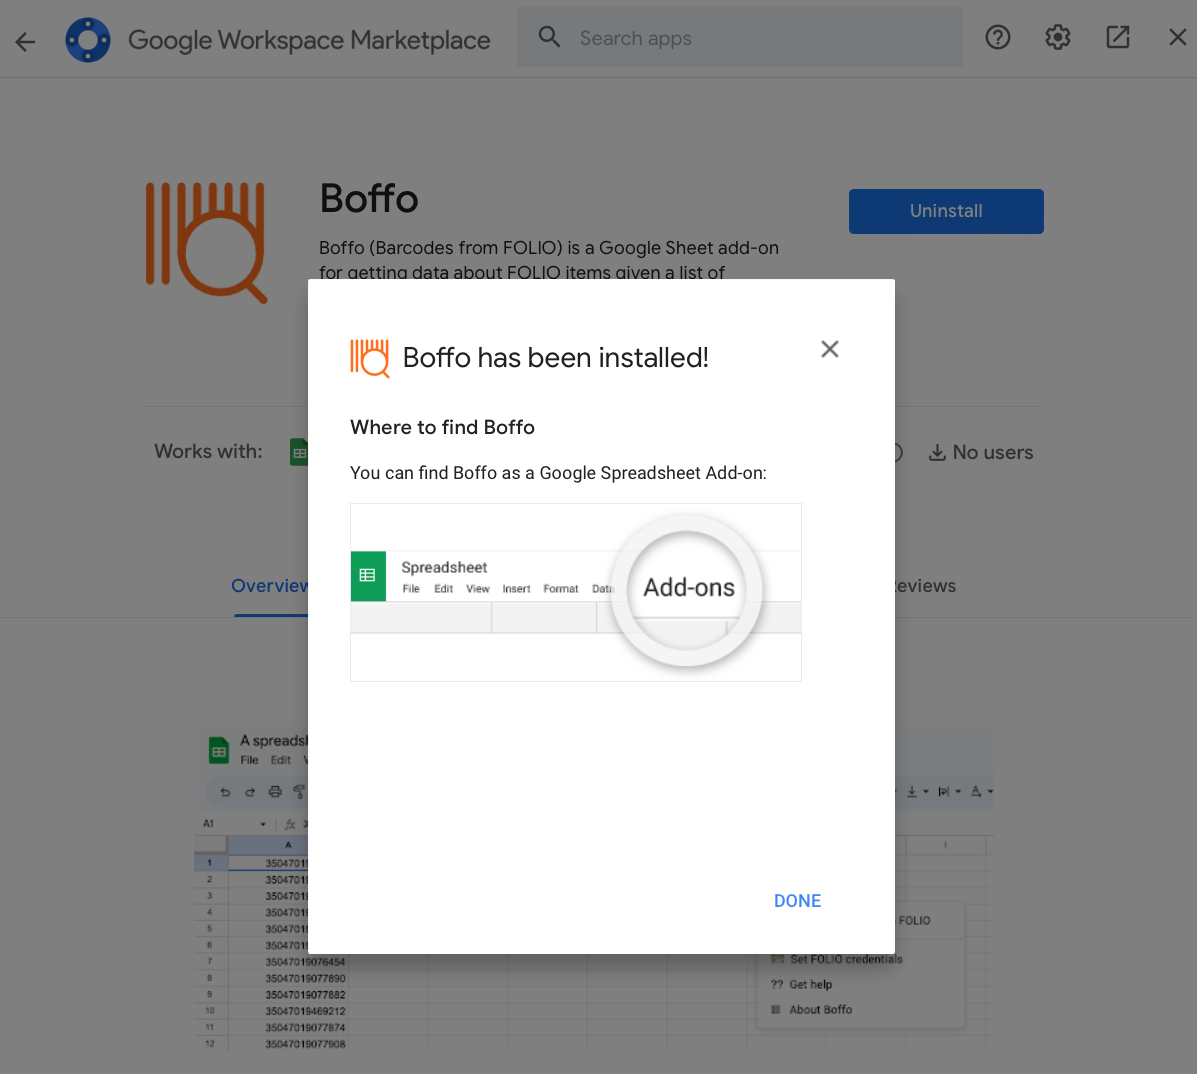
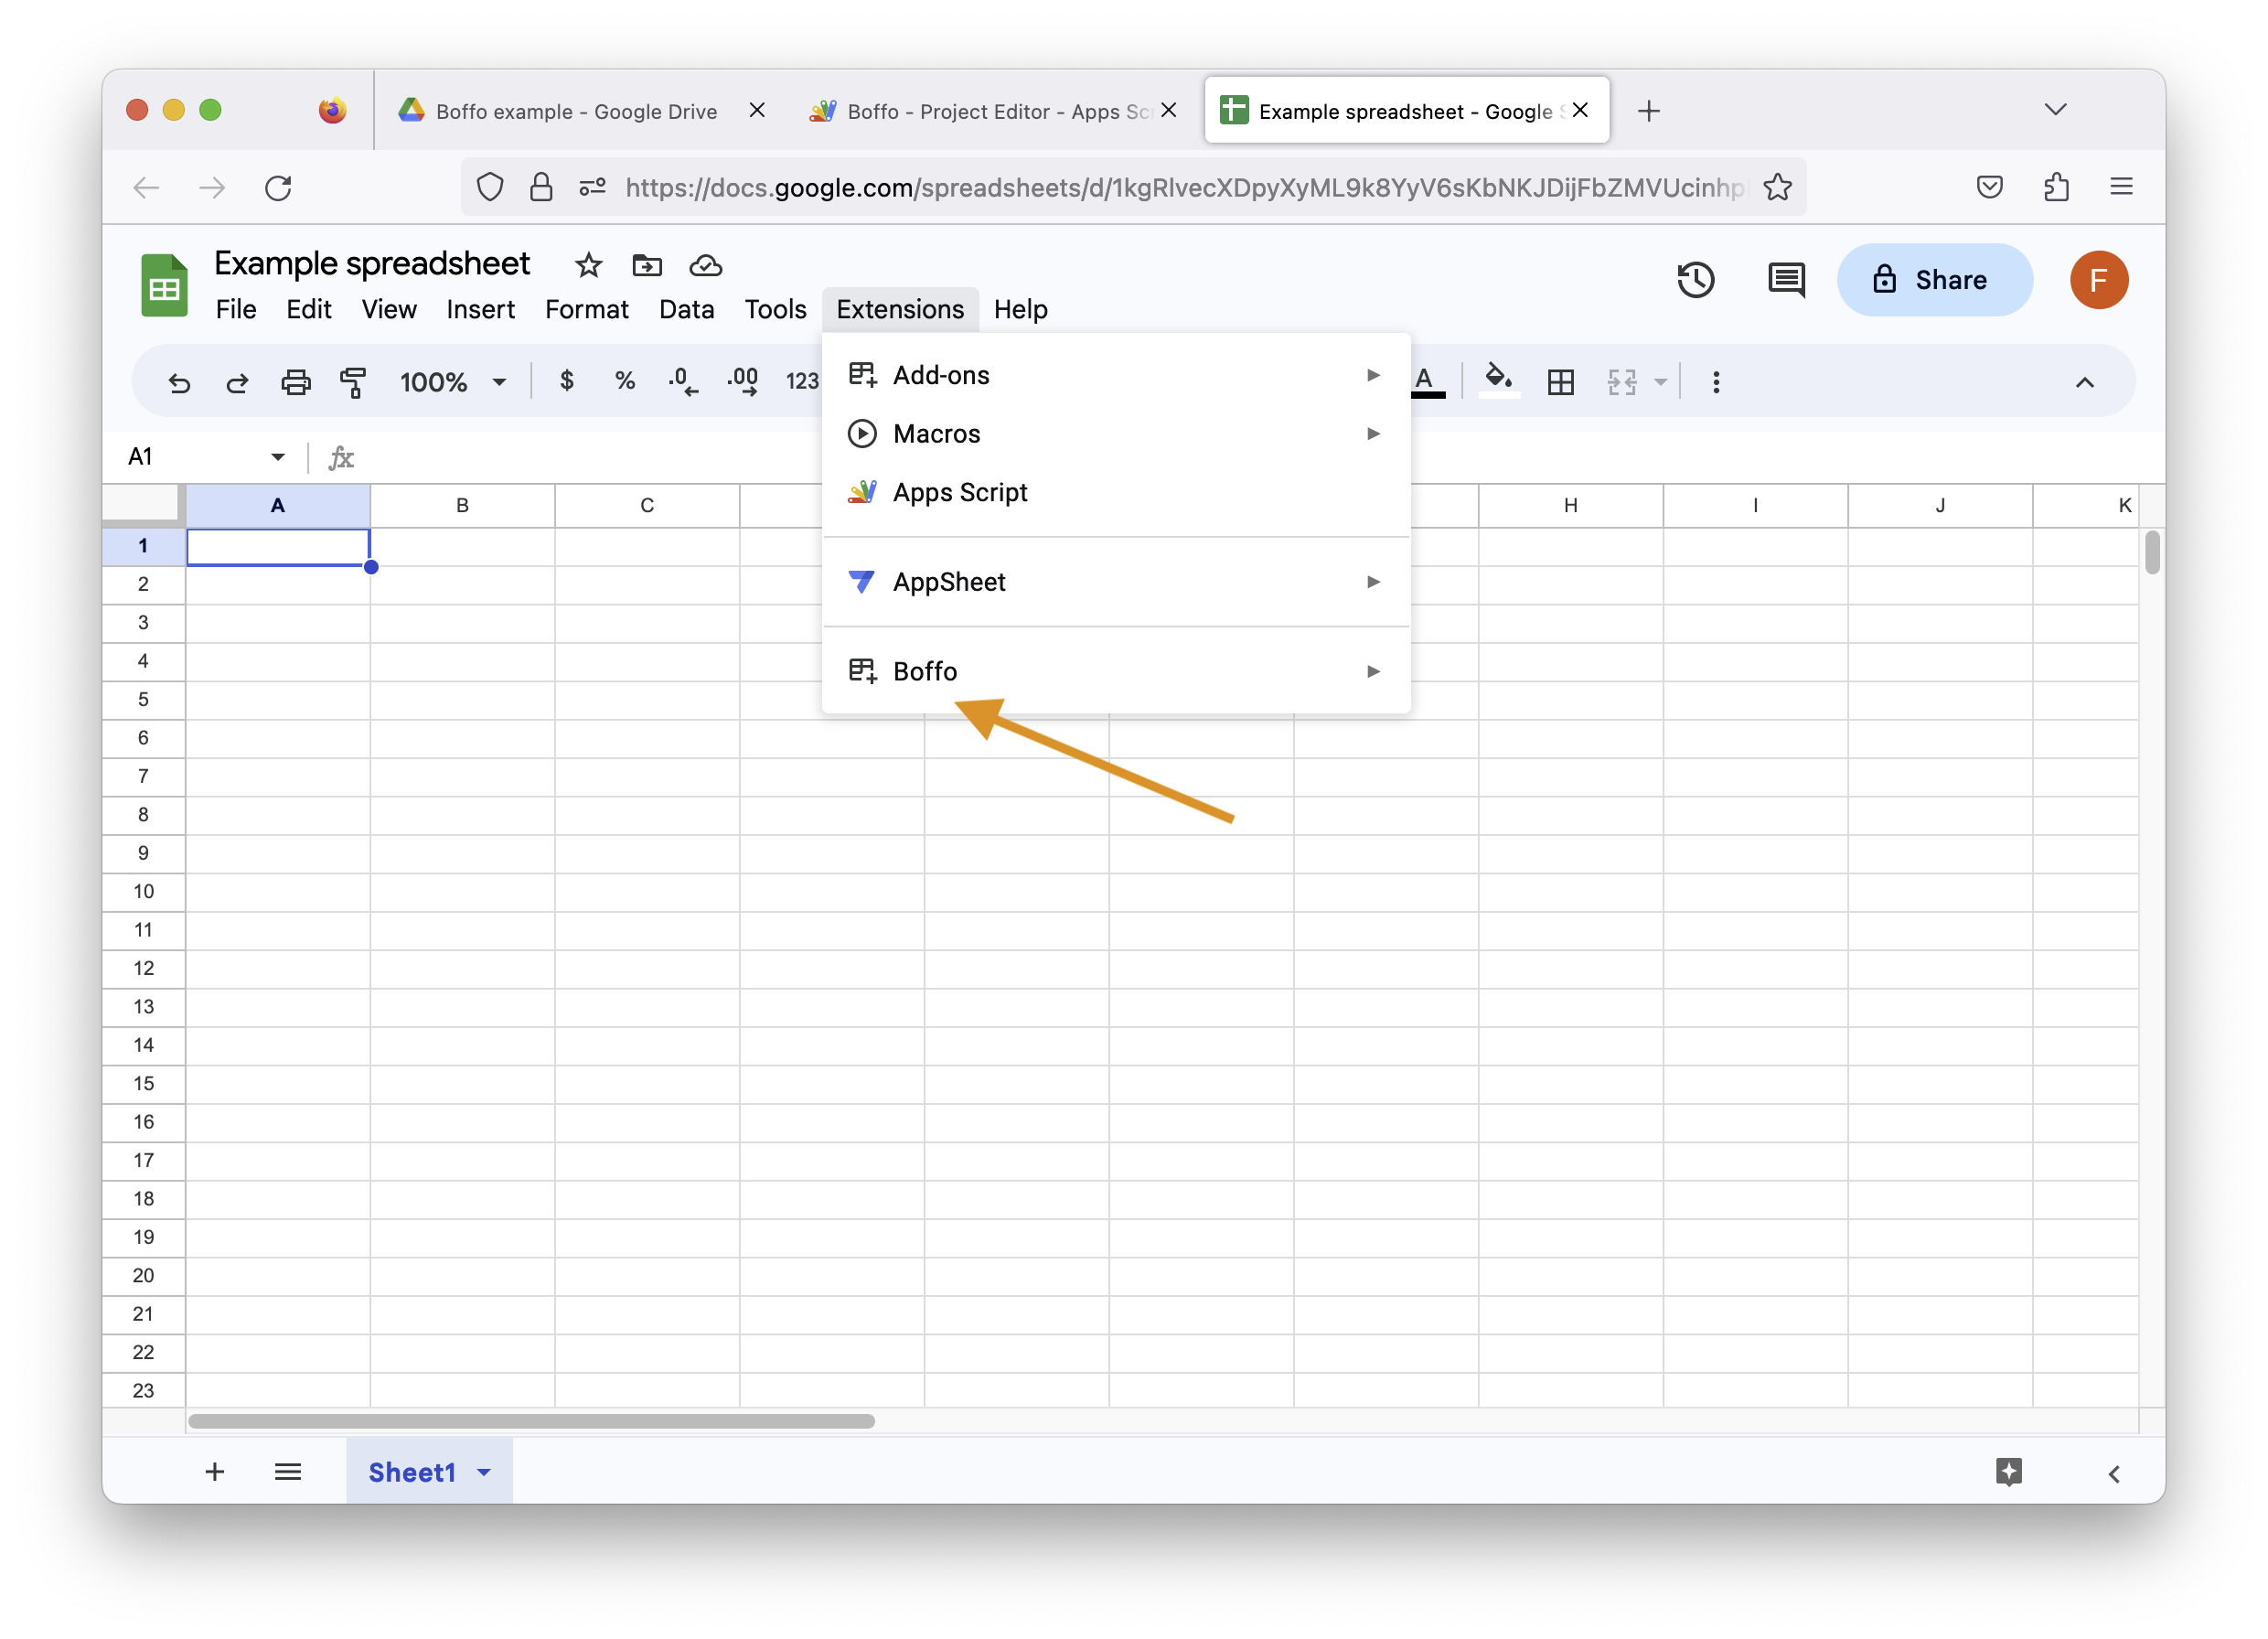
This dialog states that Boffo has been installed under a menu titled Add-ons, but that is incorrect. In fact, Google installs it in a menu titled Extensions. Please ignore the instructions to look for an Add-ons menu. This pop-up is automatically generated by Google’s system and not under the control of Boffo, and we can’t change it.
Reinstalling Boffo
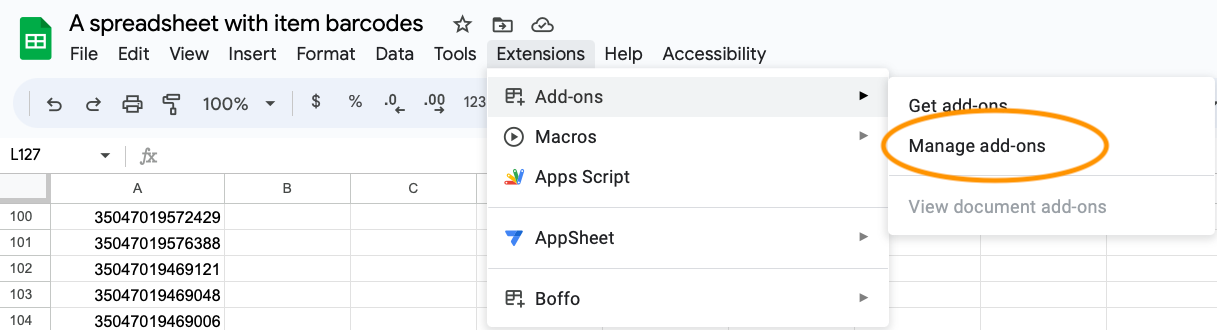
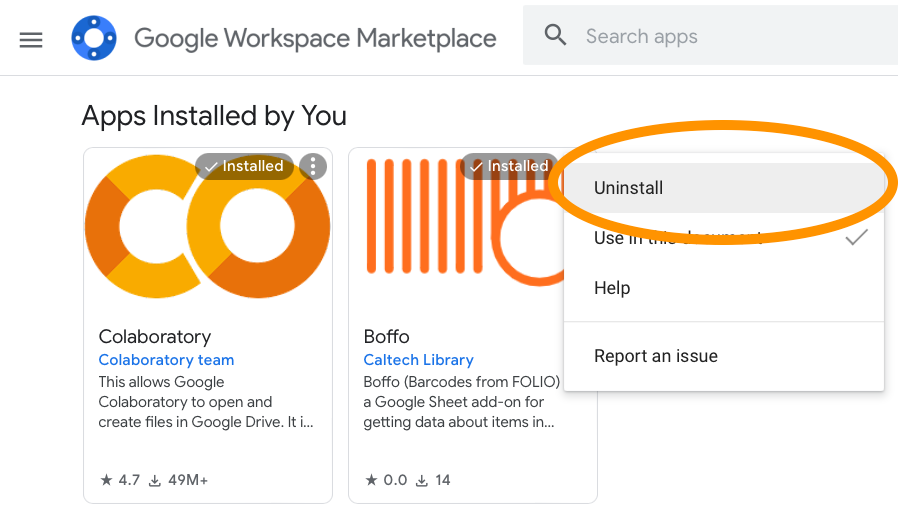
If you have already installed Boffo in your Google Spreadsheets, and want to update Boffo to the latest version, you will need to uninstall it and reinstall it. To uninstall Boffo, first look for the Extensions menu at the top of your Google sheet, click on it, then click on the item Manage add-ons from the Add-ons submenu:
In the Google workspace dialog that pop-ups, click on the 3 dots in the upper right corner of the Boffo icon:
In the pop-up menu that you get from clicking the 3 dots, select Uninstall:
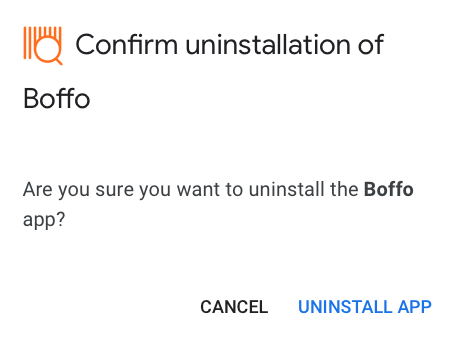
You’ll be asked to confirm the uninstallation in yet another dialog; click on the button for UNINSTALL APP in that dialog:
When that dialog goes away, close the Google Workspace Marketplace dialog, and now follow the steps described above to install Boffo as if for the first time.
Directly from source
If you are not at Caltech, you will not be able find Boffo in the Google Marketplace for add-ons. Instead, you will have to install the code from the source files in some way. The following subsections describe two possible methods.
Copying the Google Apps Script project
This approach does not require the use of command-line tools, but it does require some patience and care because some of the steps below are quite unintuitive.
(Optional, but recommended for your sanity.) Create a folder in your Google Drive where you will put the Boffo project files that will be created in the following steps. For the purposes of this documentation, let’s assume that this folder is named “Boffo example”.
Go to the public folder for Boffo in Google Drive. It should look more or less like what is shown in the screenshot below.

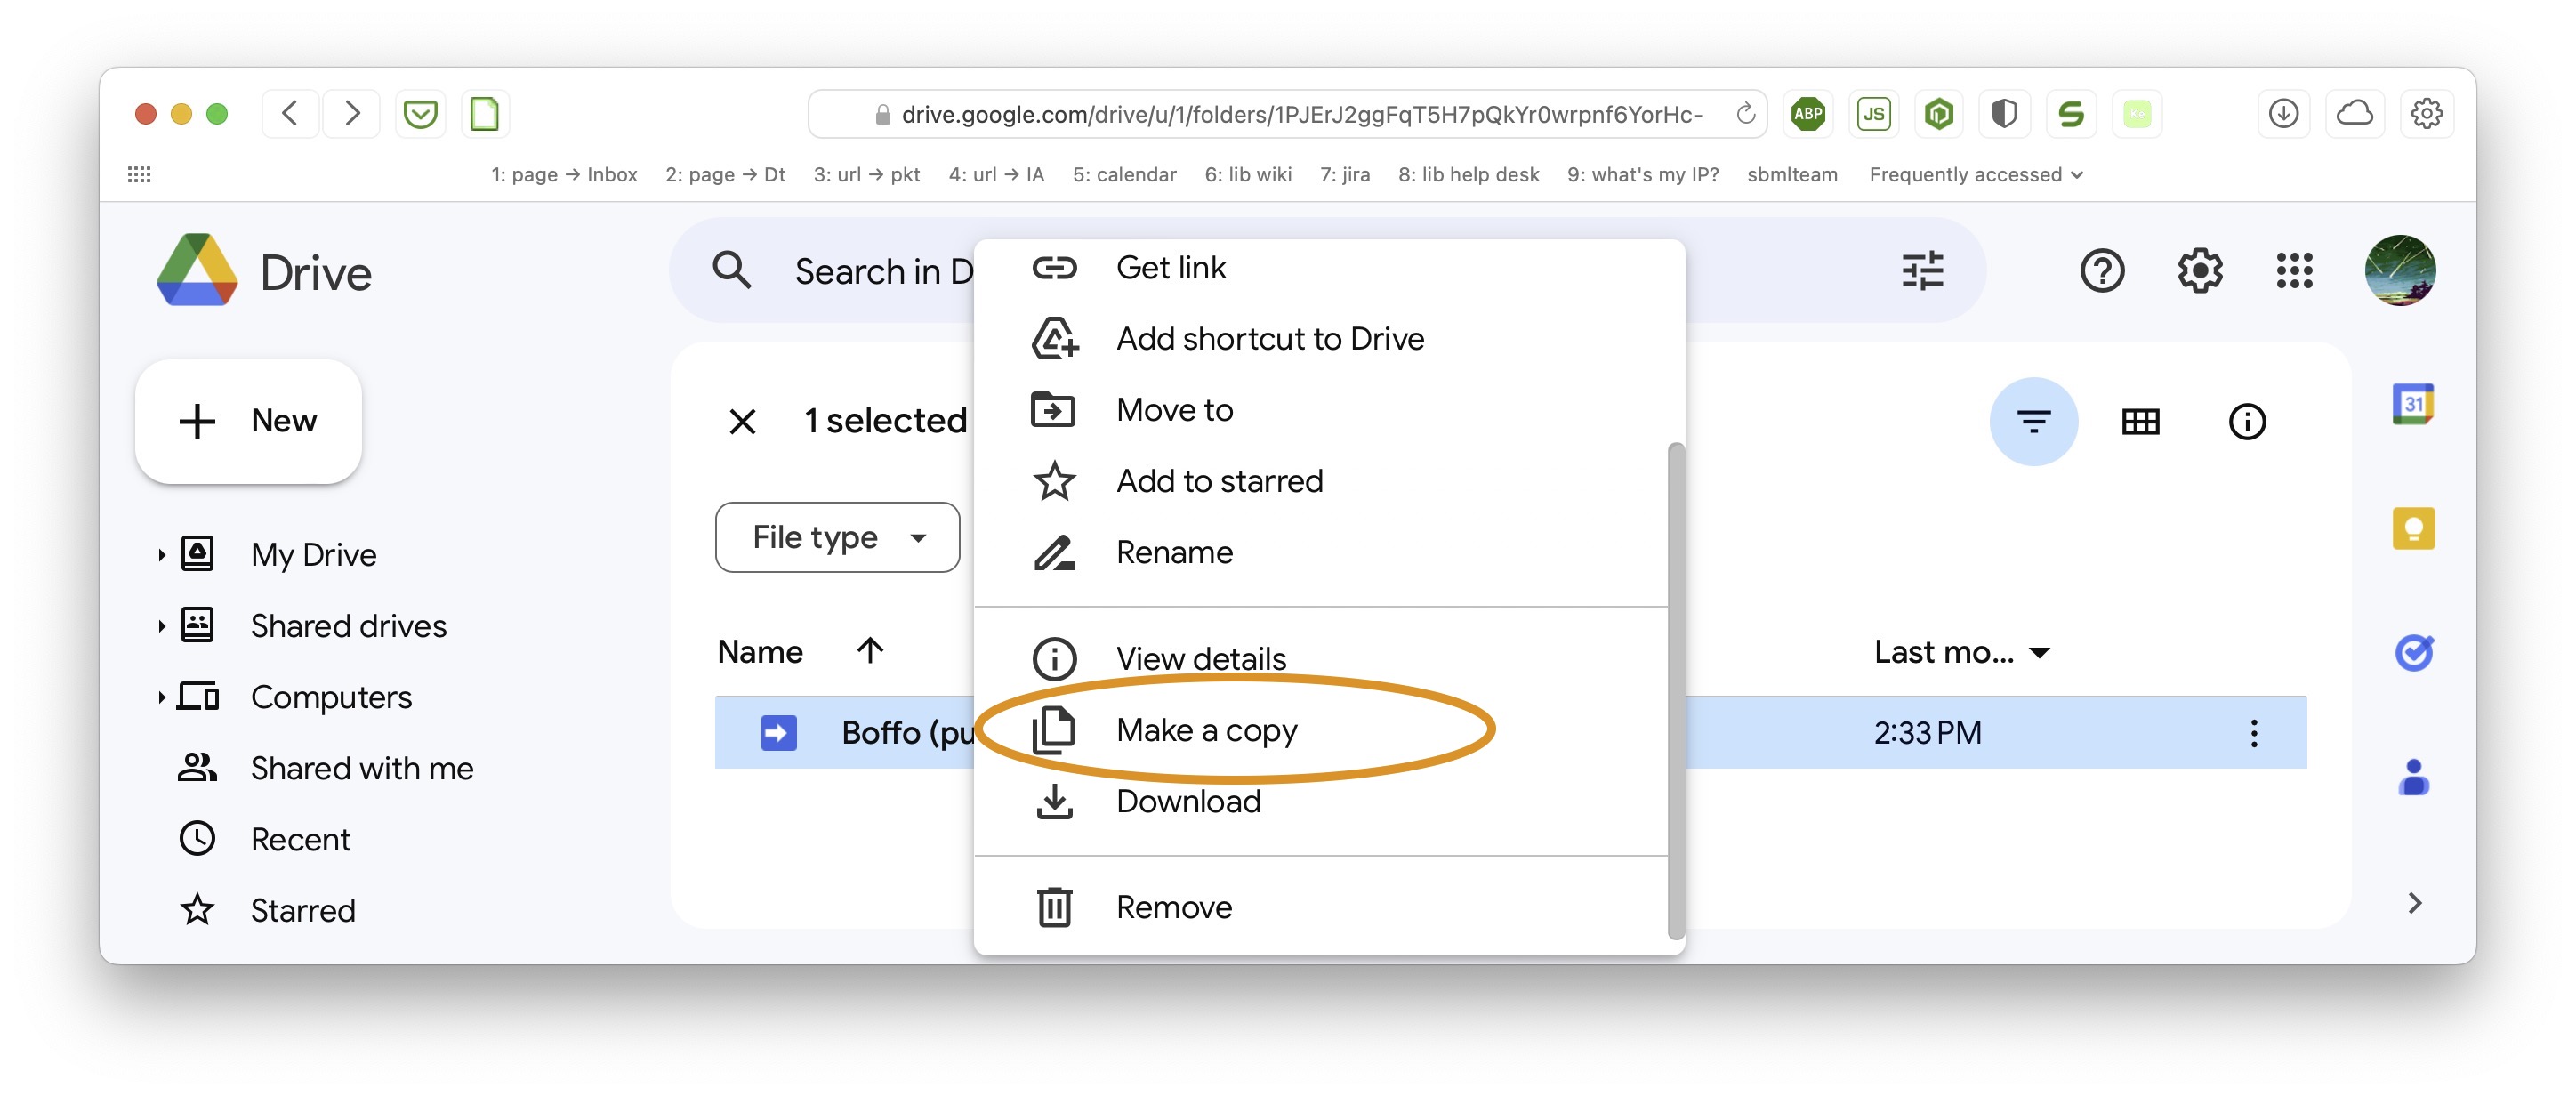
Right-click over the apps script project named “Boffo (public copy)” and select Make a copy from the contextual menu that pops up.
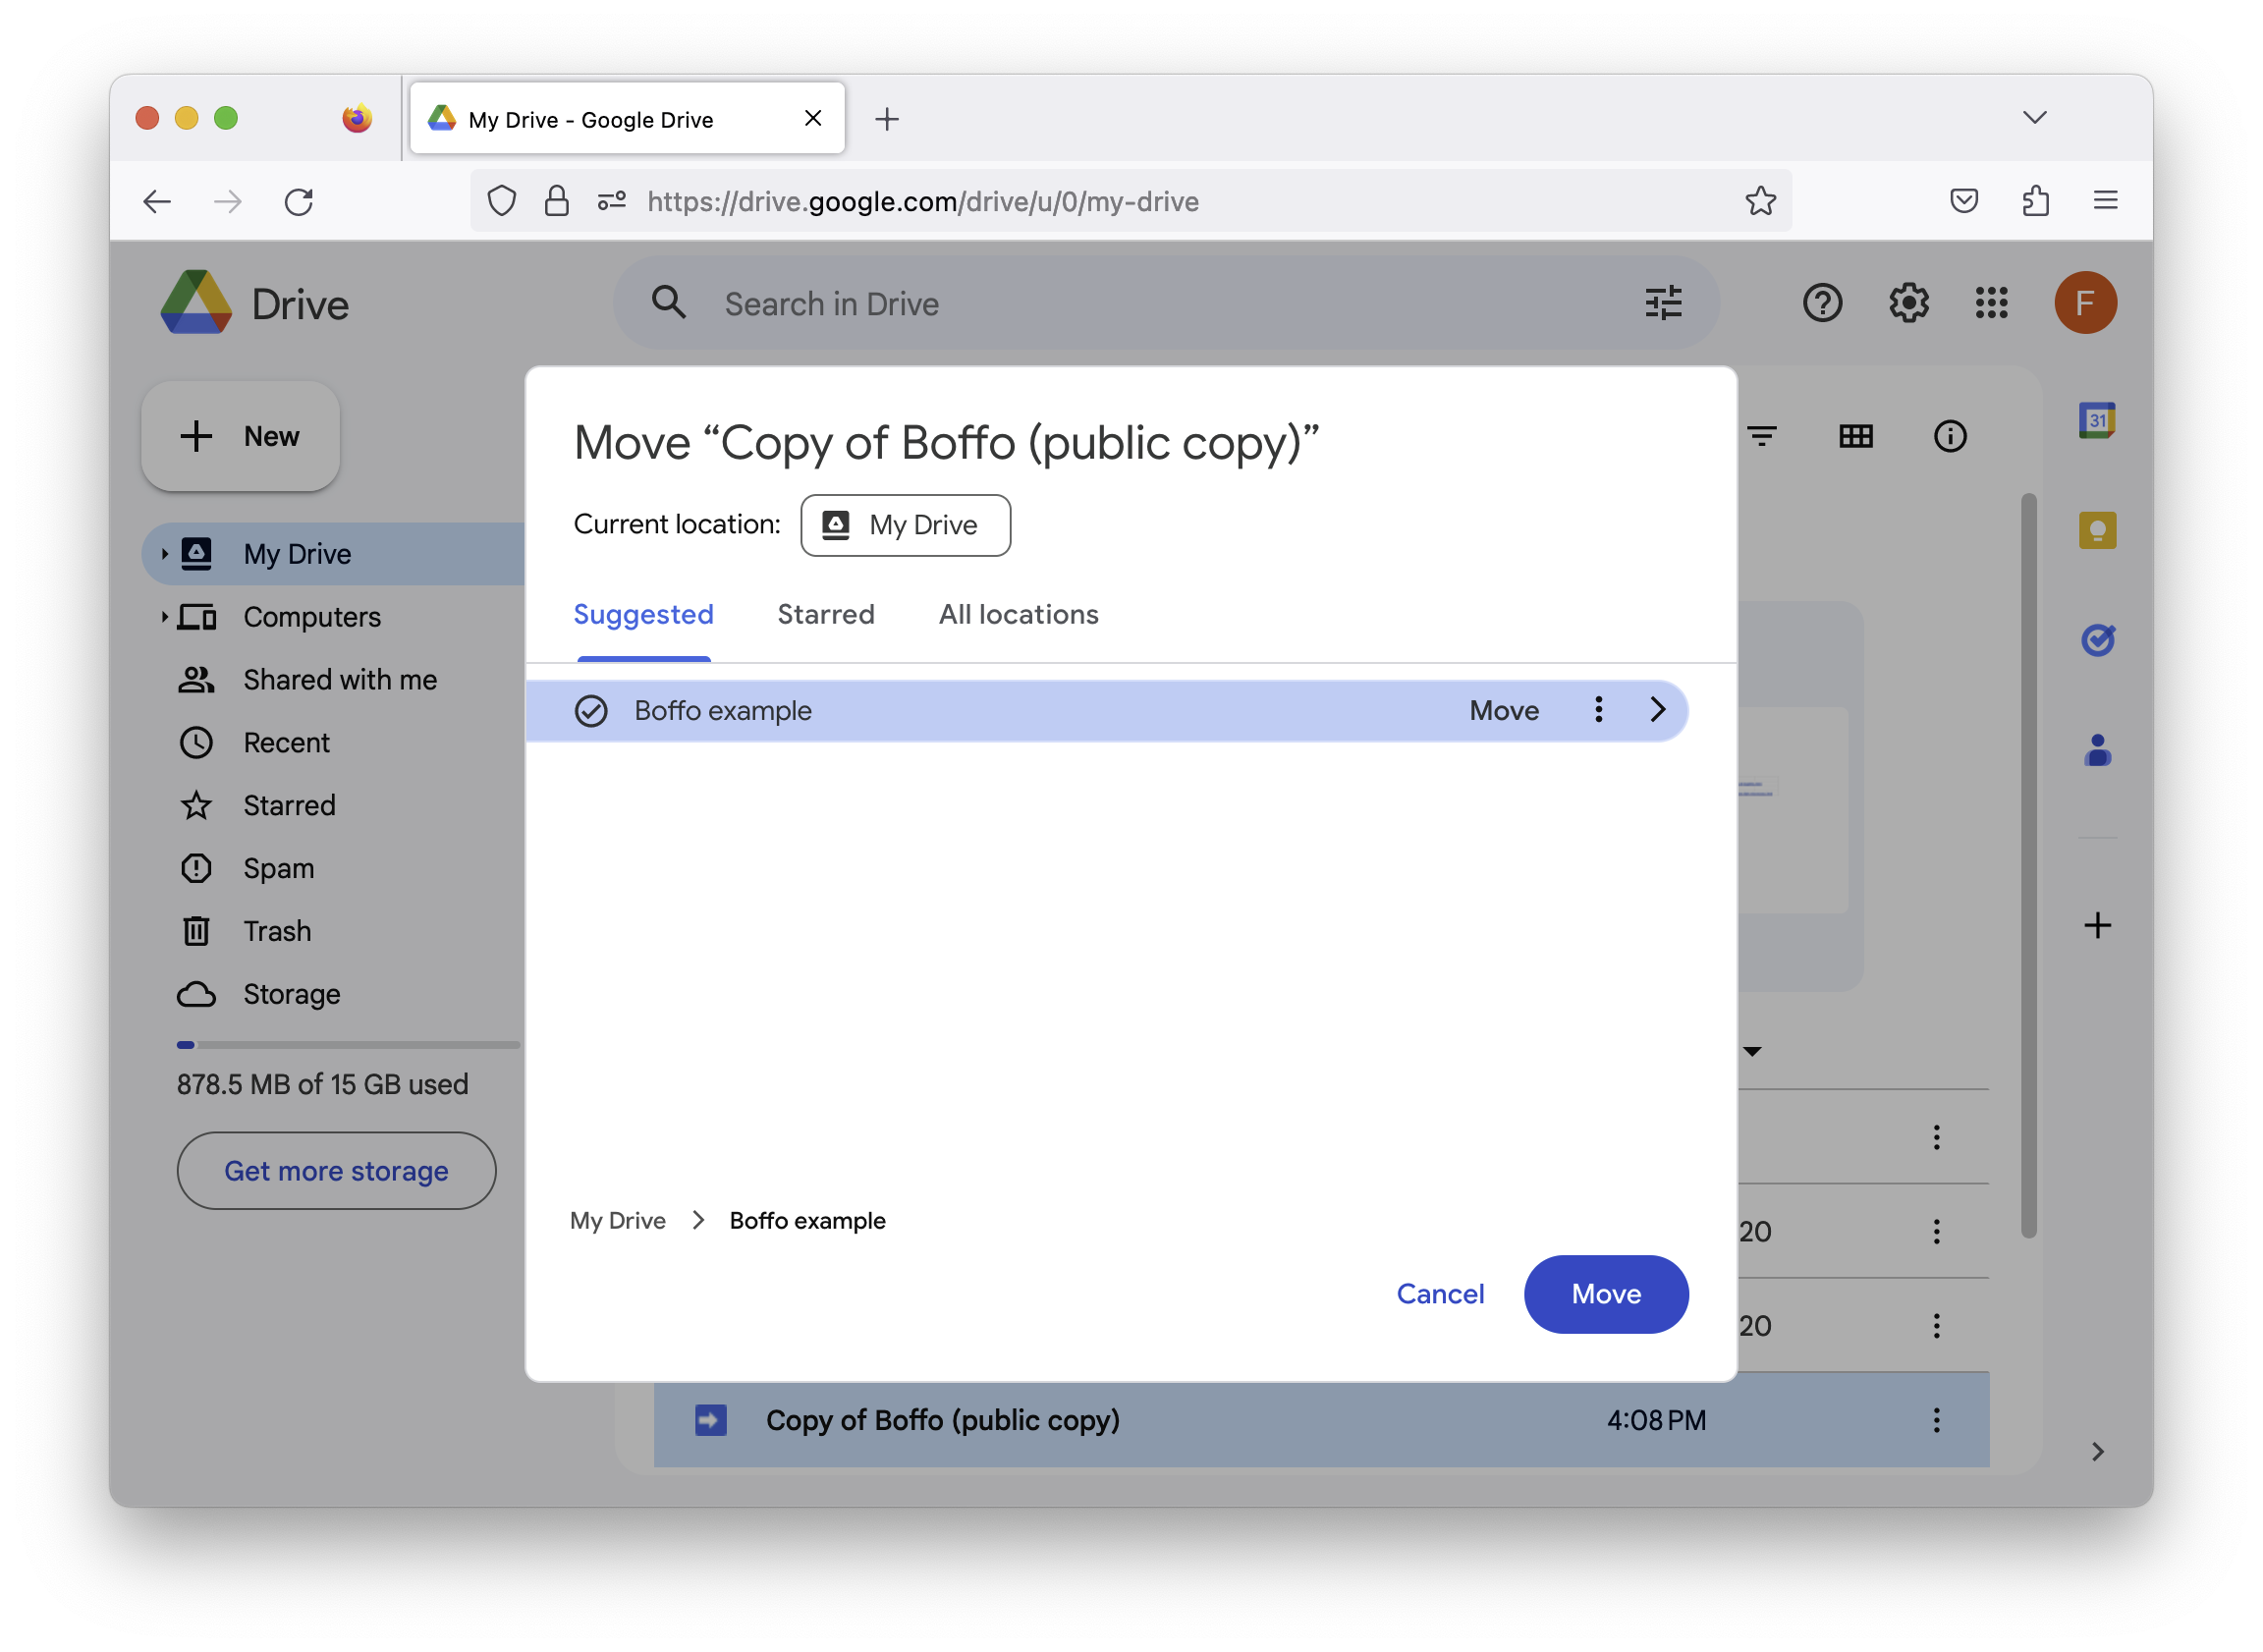
Go to the location where the copy ended up (usually the top level of your Google Drive) and look for the newly-created apps script project named “Copy of Boffo (public copy)”. Right-click on it, and select Move to from the contextual menu that pops-up.

From the move dialog, select the destination (in this example, the folder named “Boffo example” suggested in step #1 above).
Navigate to the destination folder where you put it in your Google Drive.
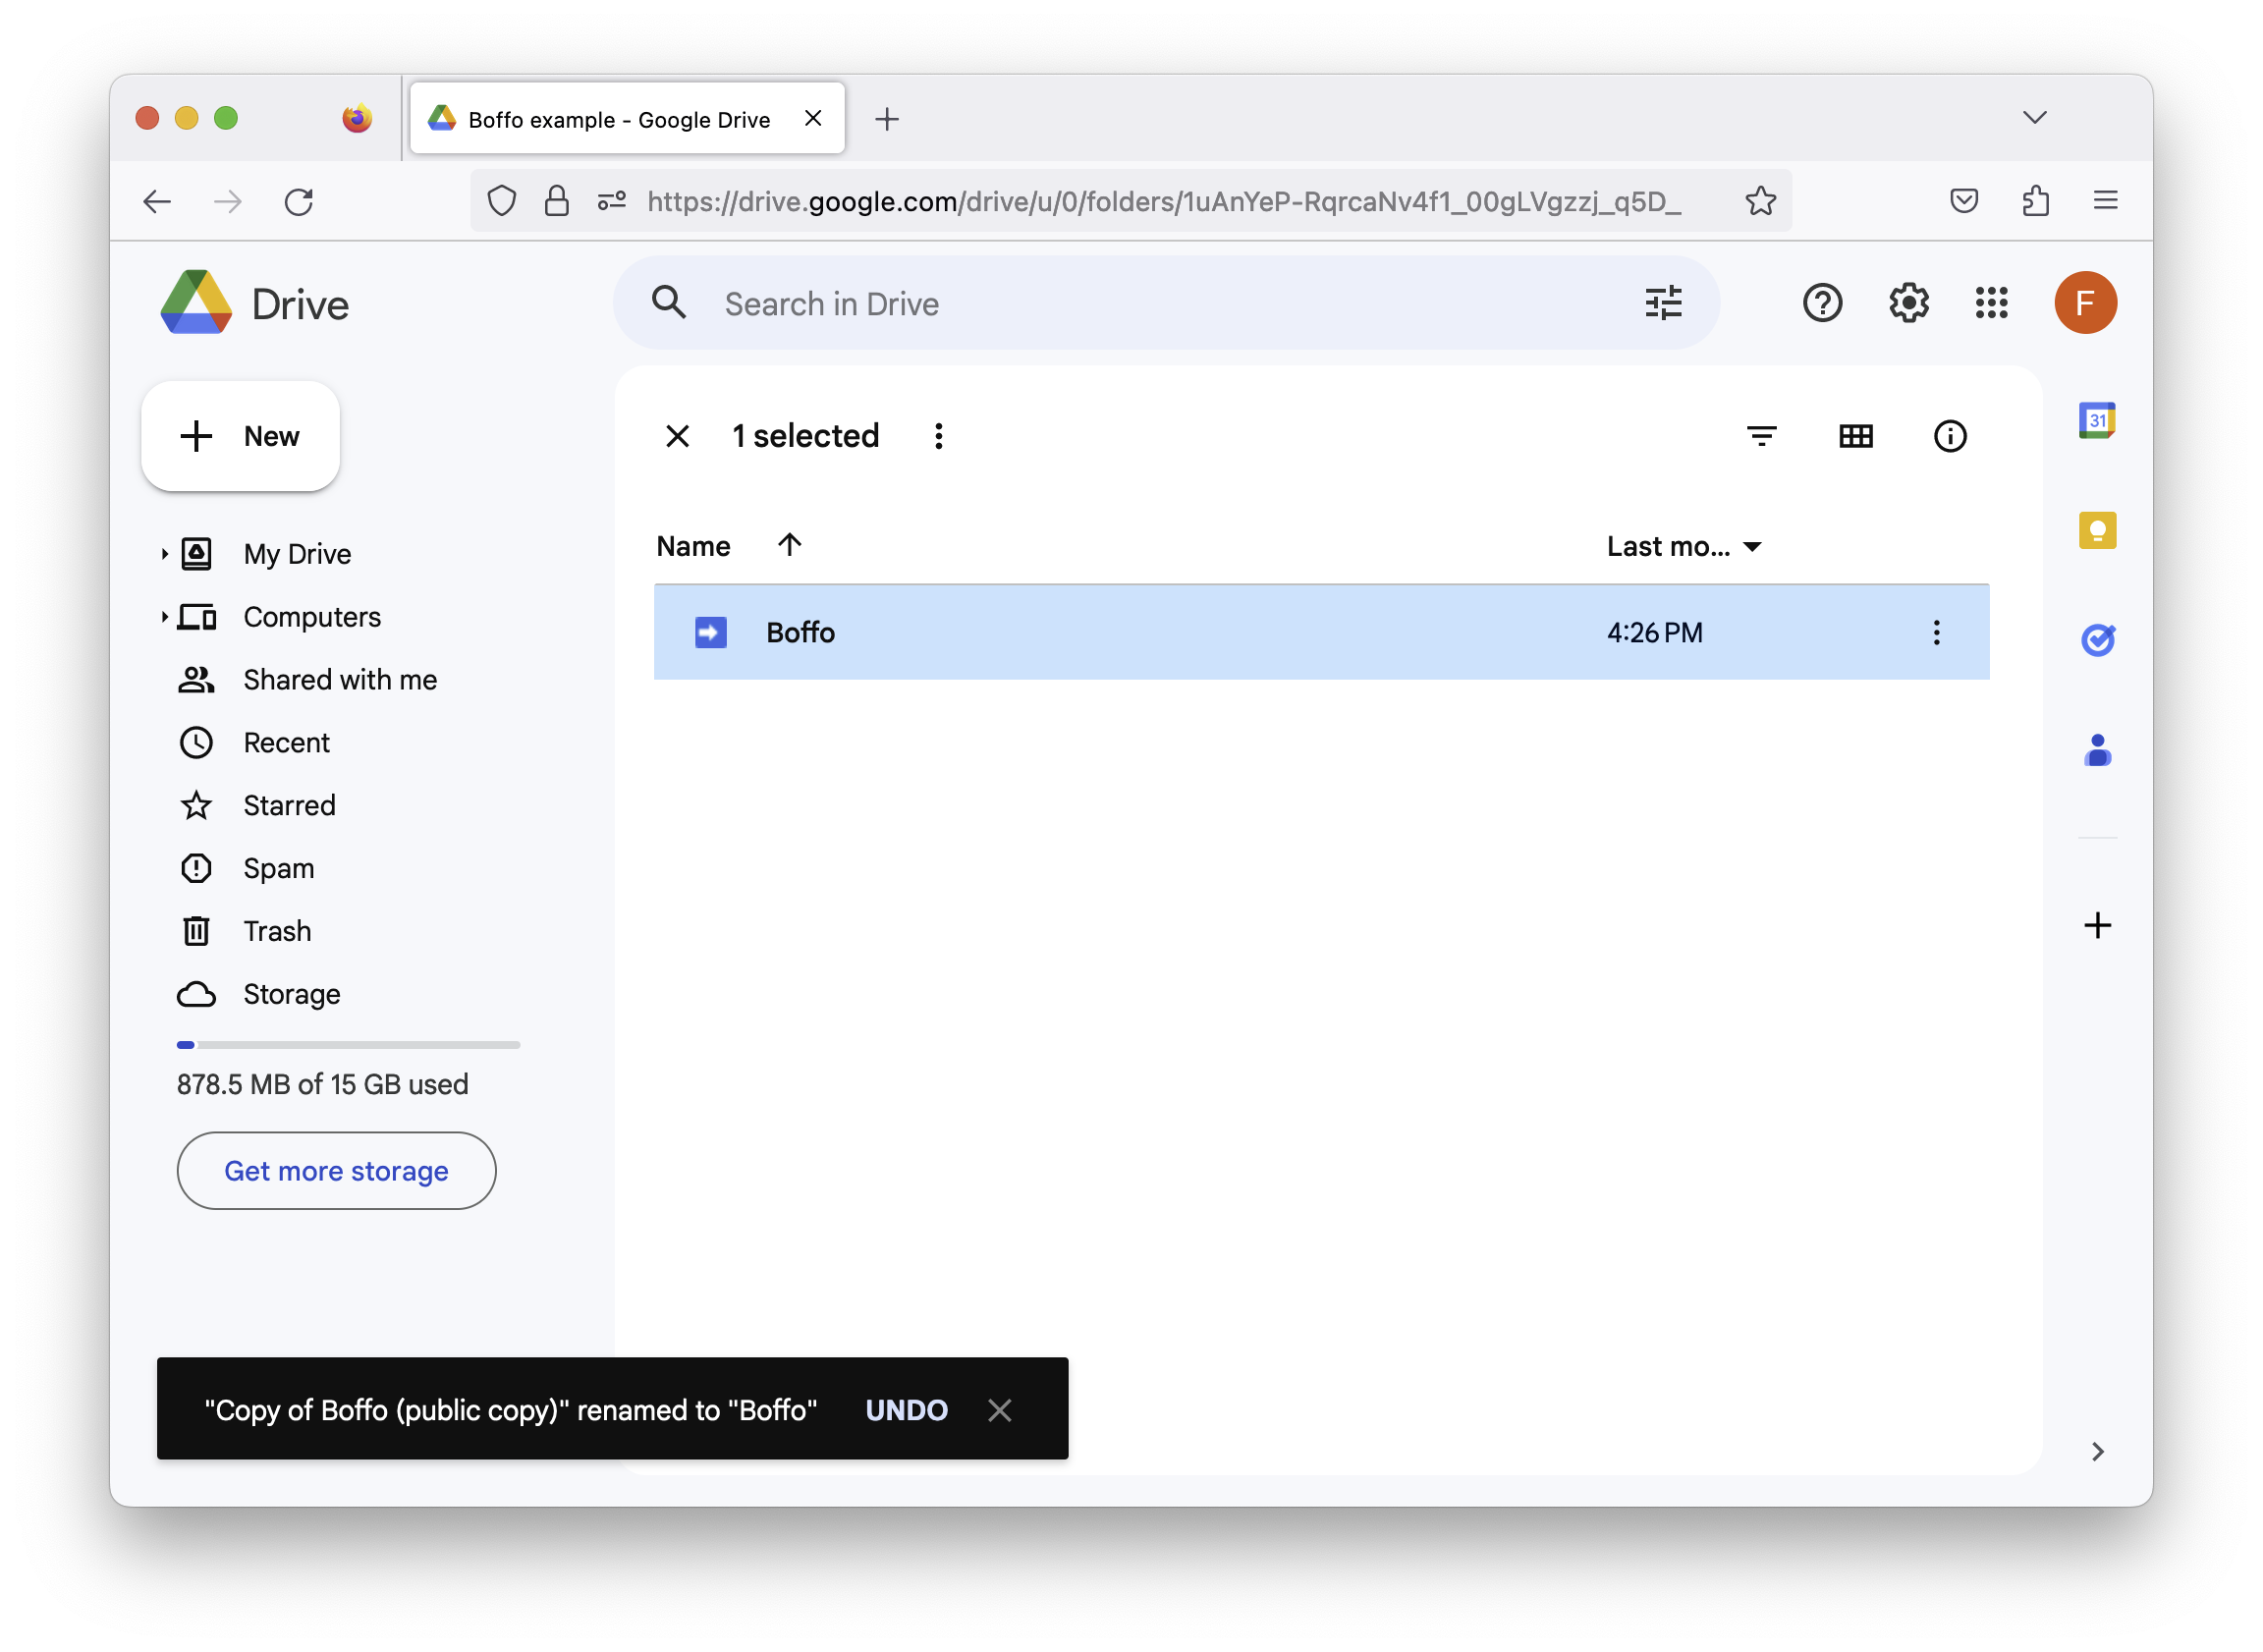
(Optional, but why not?) Rename the project file “Copy of Boffo (public copy)” to something less annoying, such as just “Boffo”.
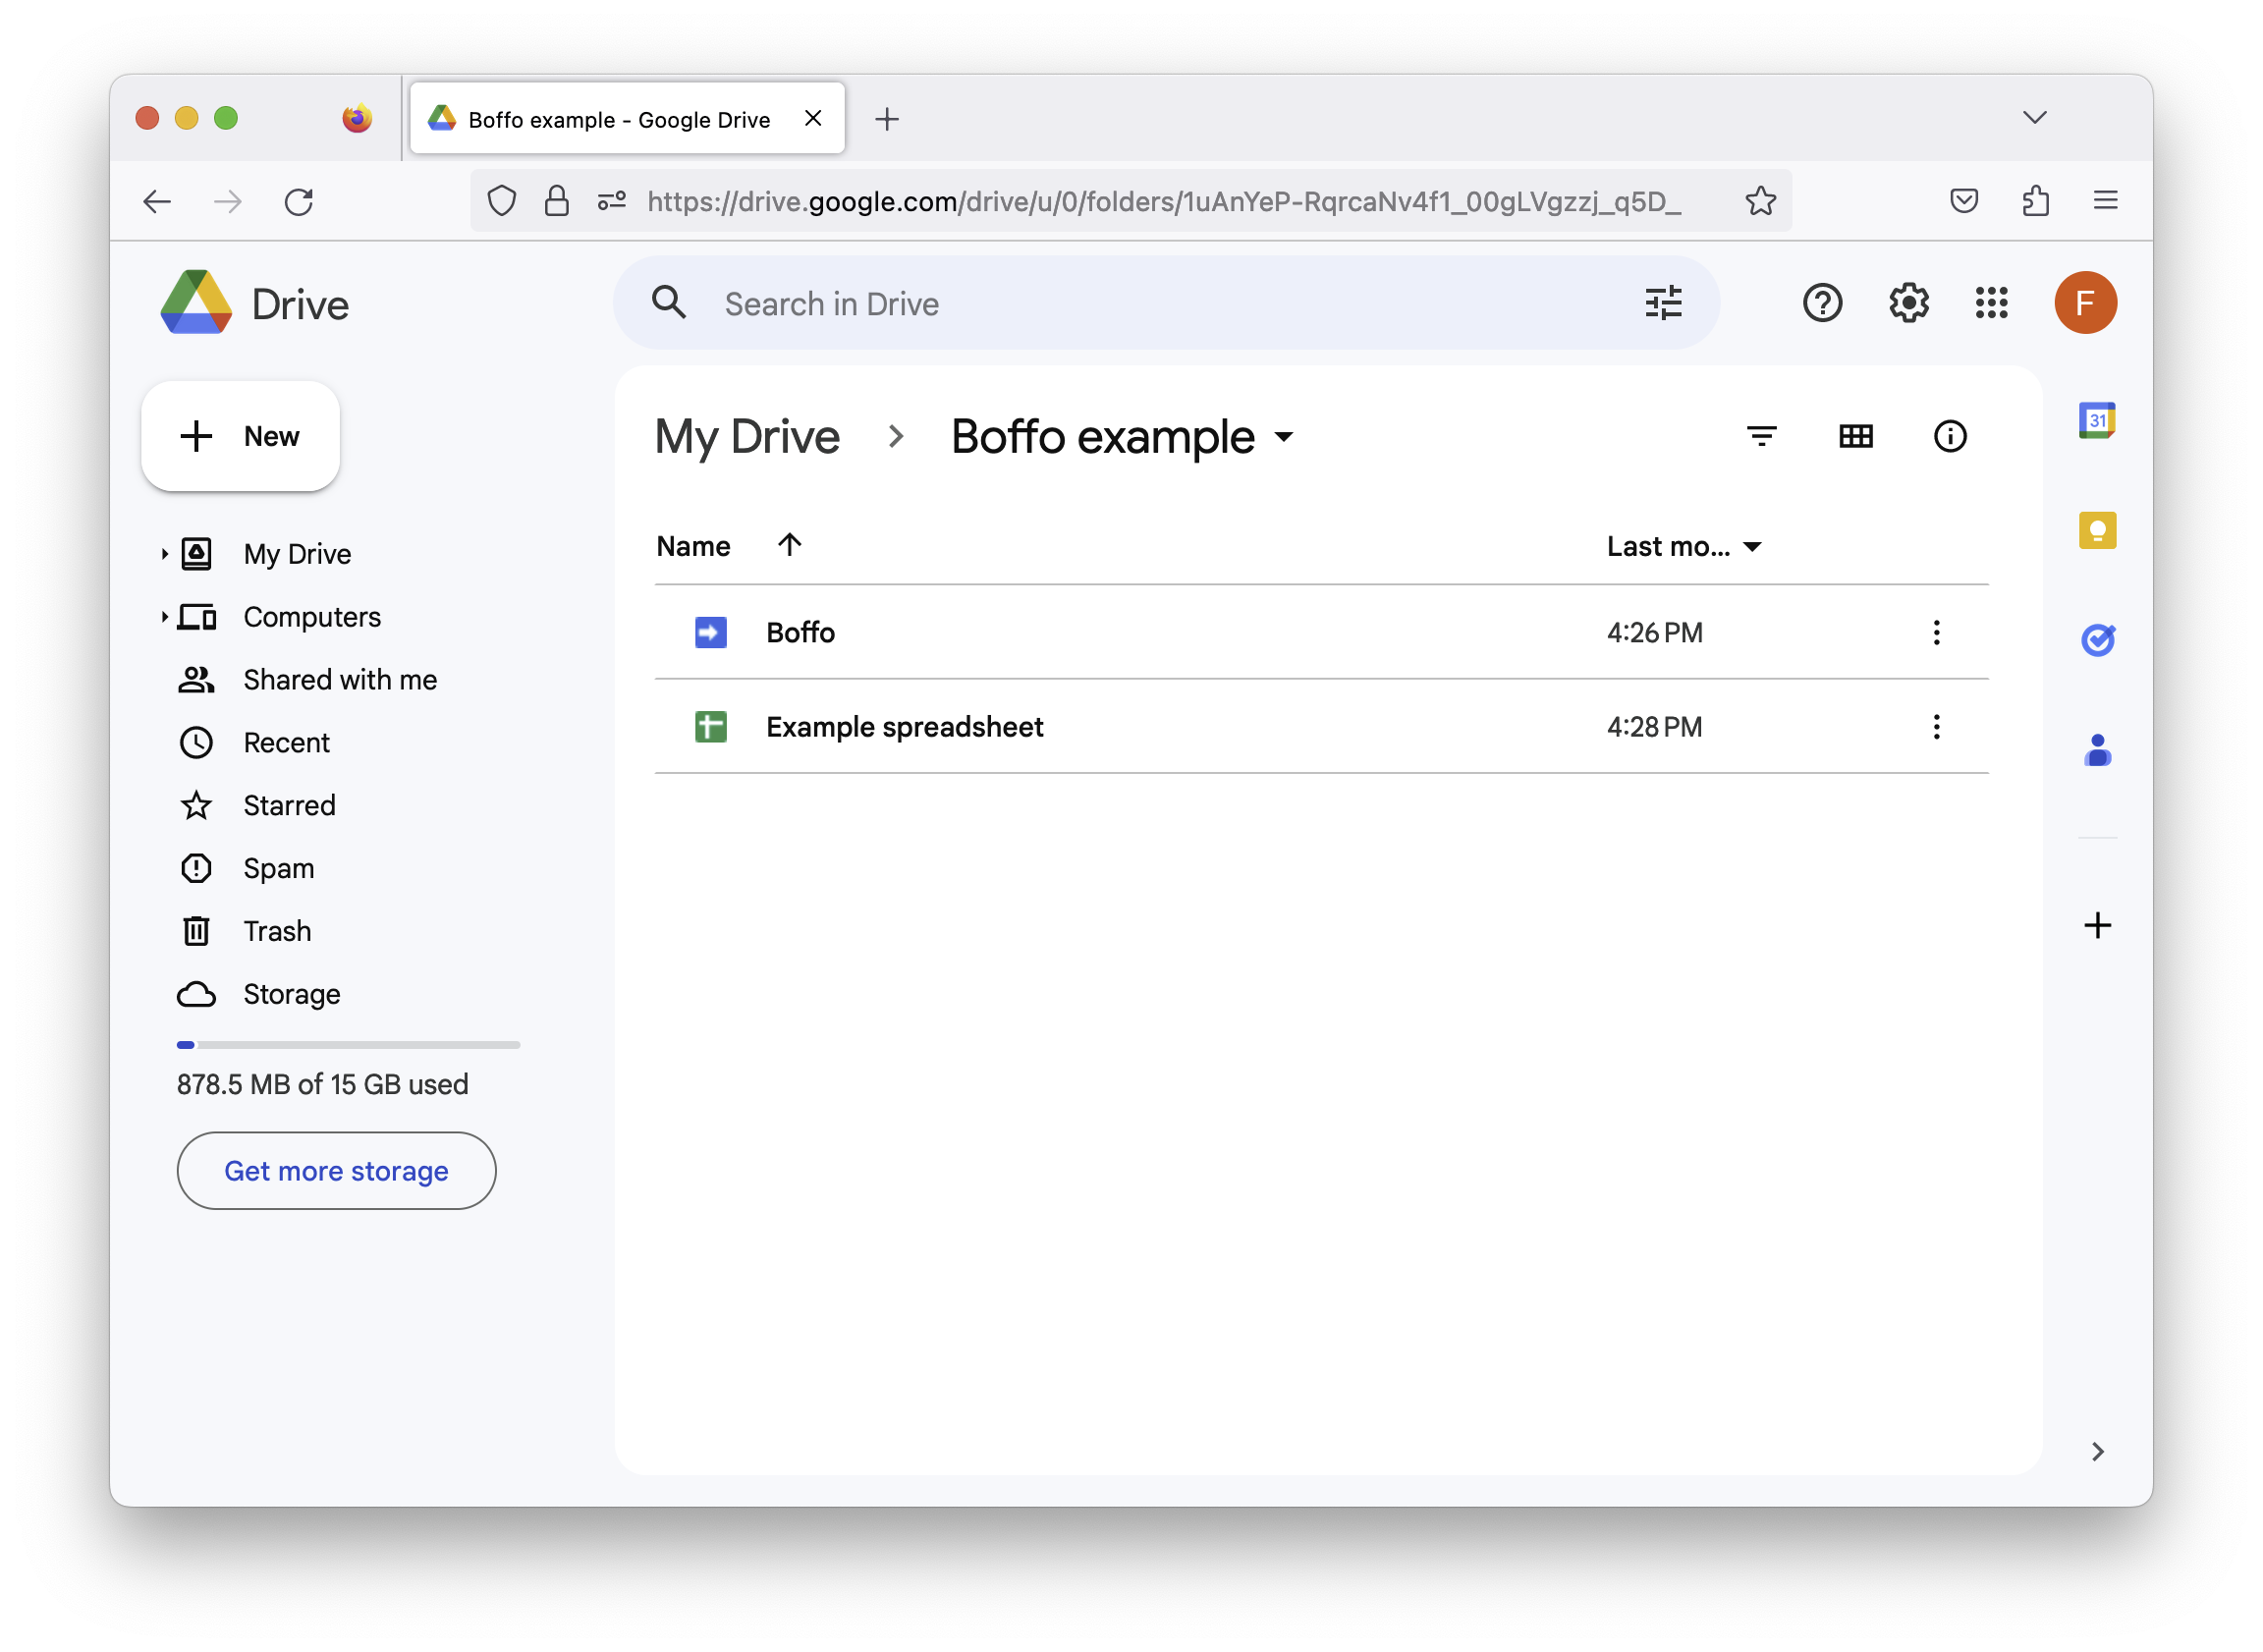
Create a spreadsheet in the folder next to the “Boffo” apps script project. For the purposes of this documentation, assume this spreadsheet is cleverly named “Example spreadsheet”.
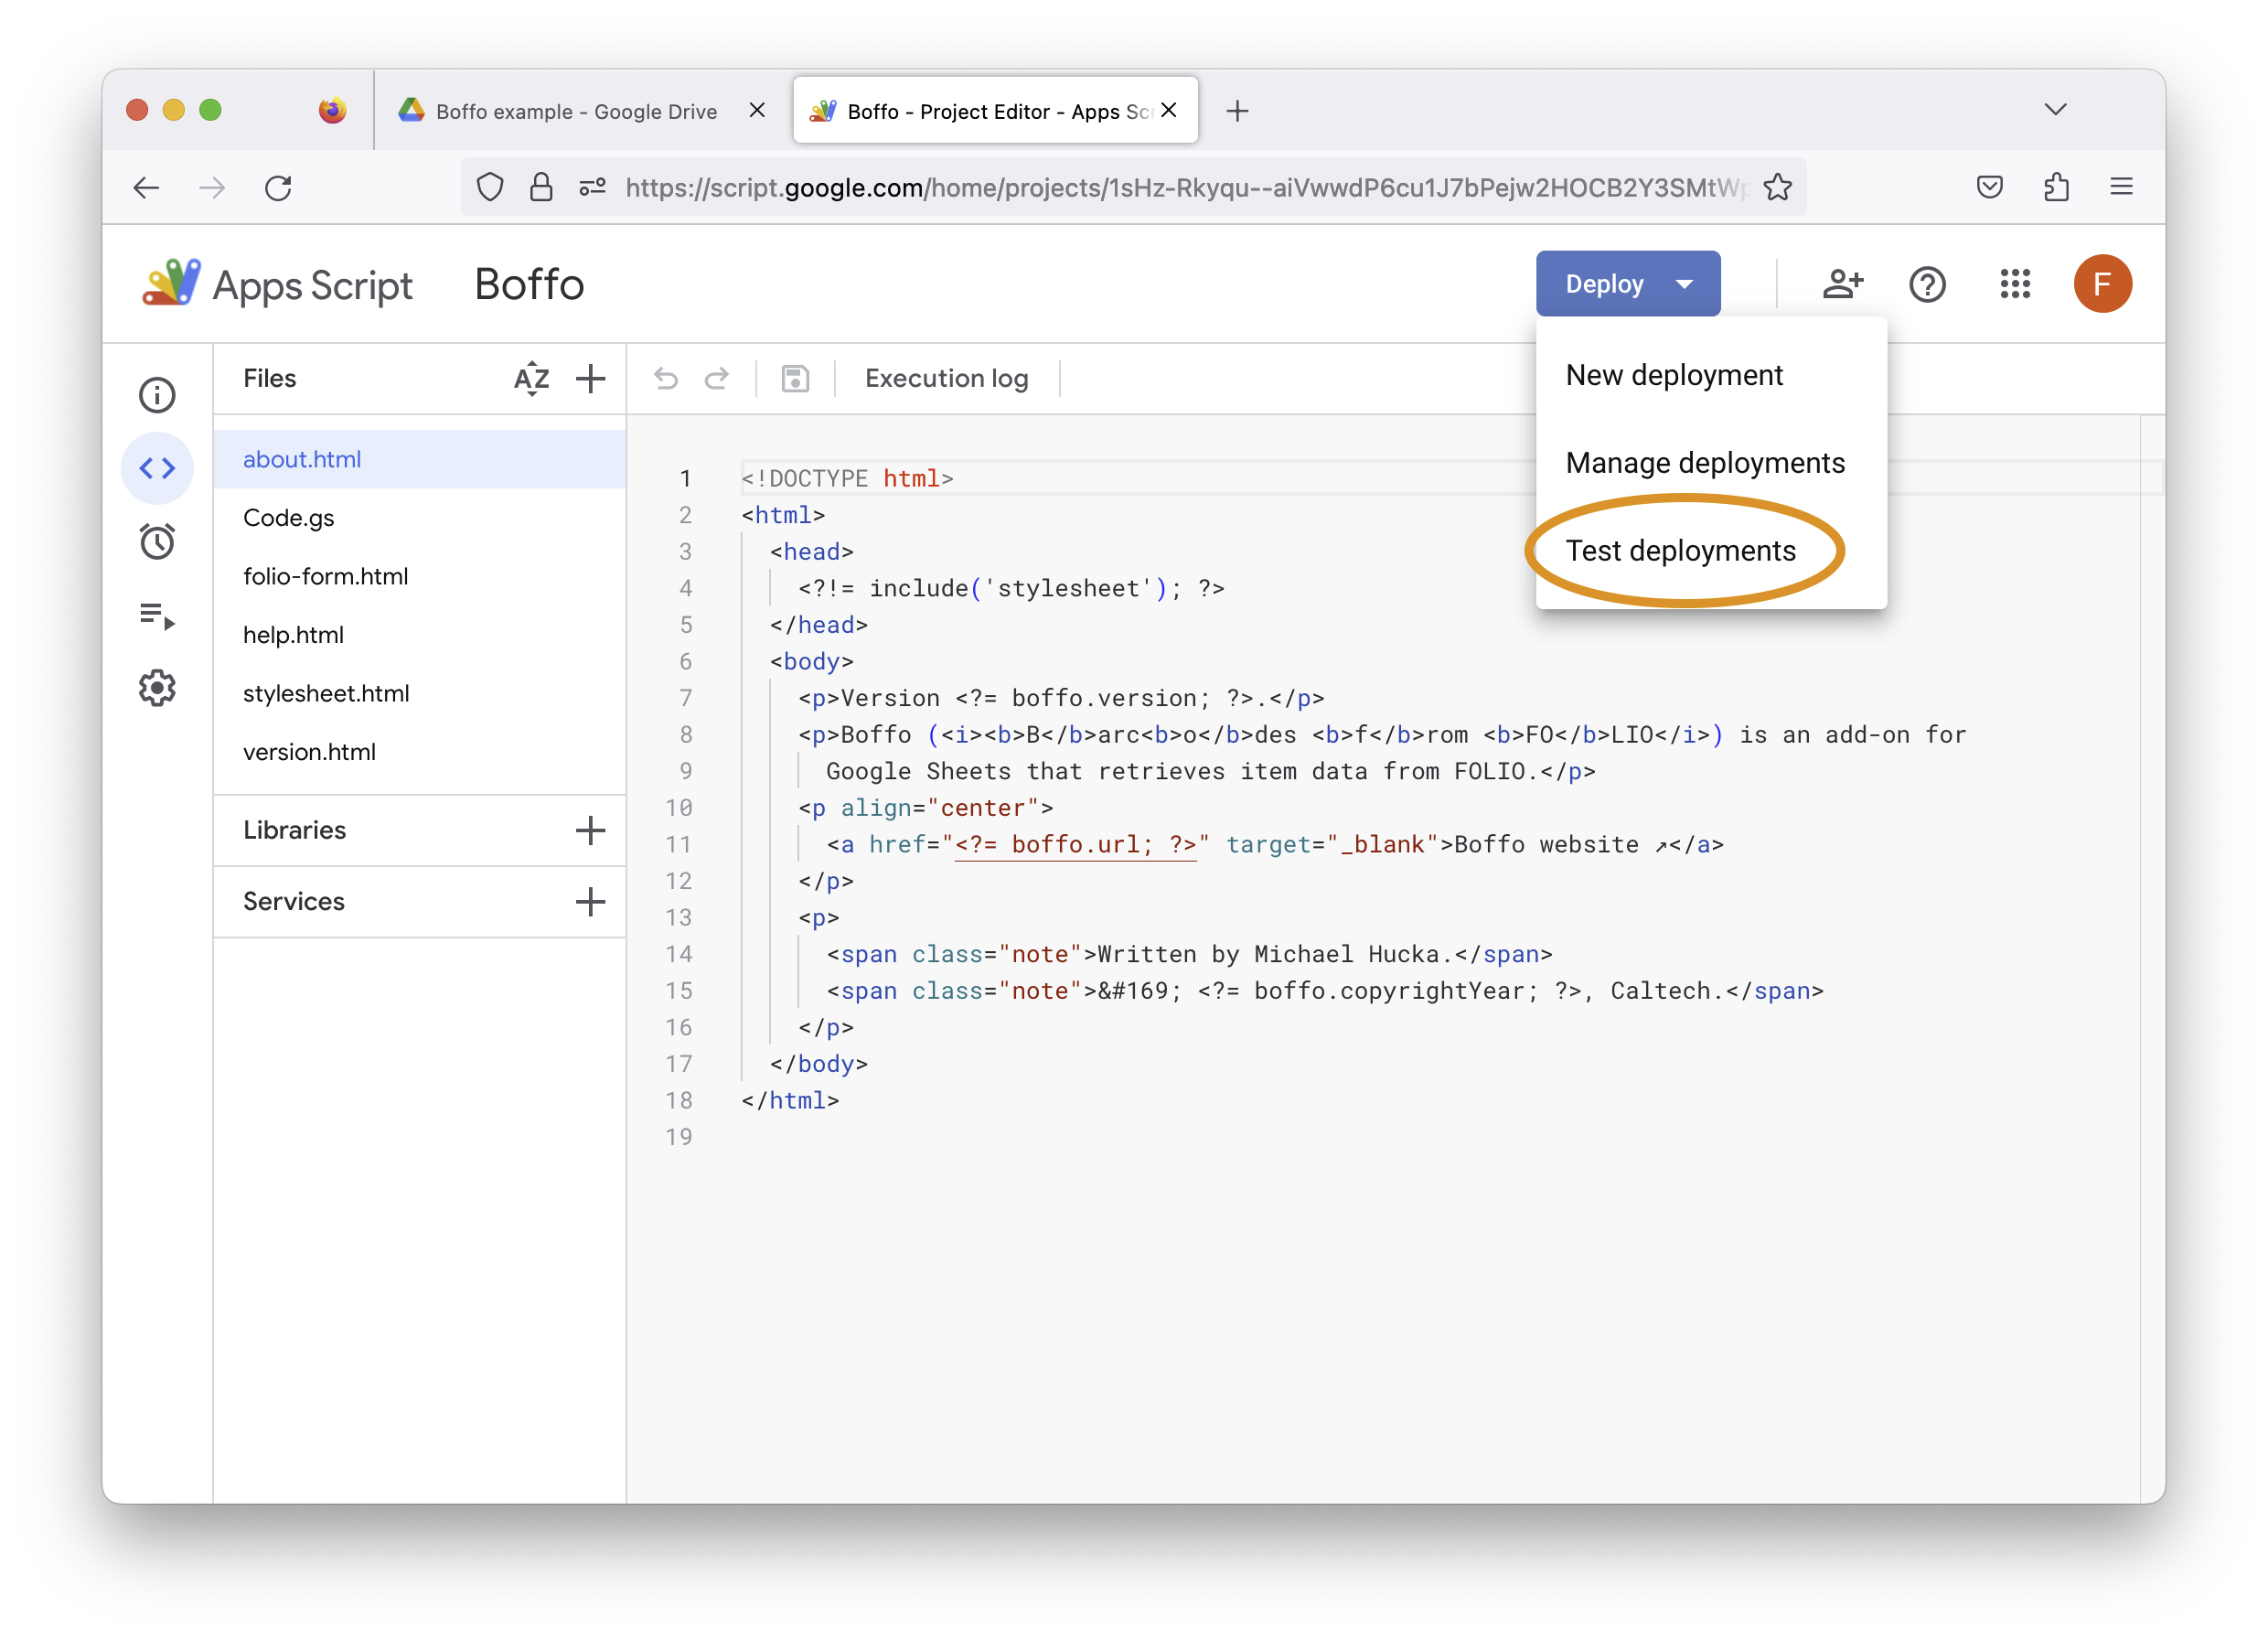
Double-click on the apps script project (not the spreadsheet!). It should look more or less like the screenshot below.

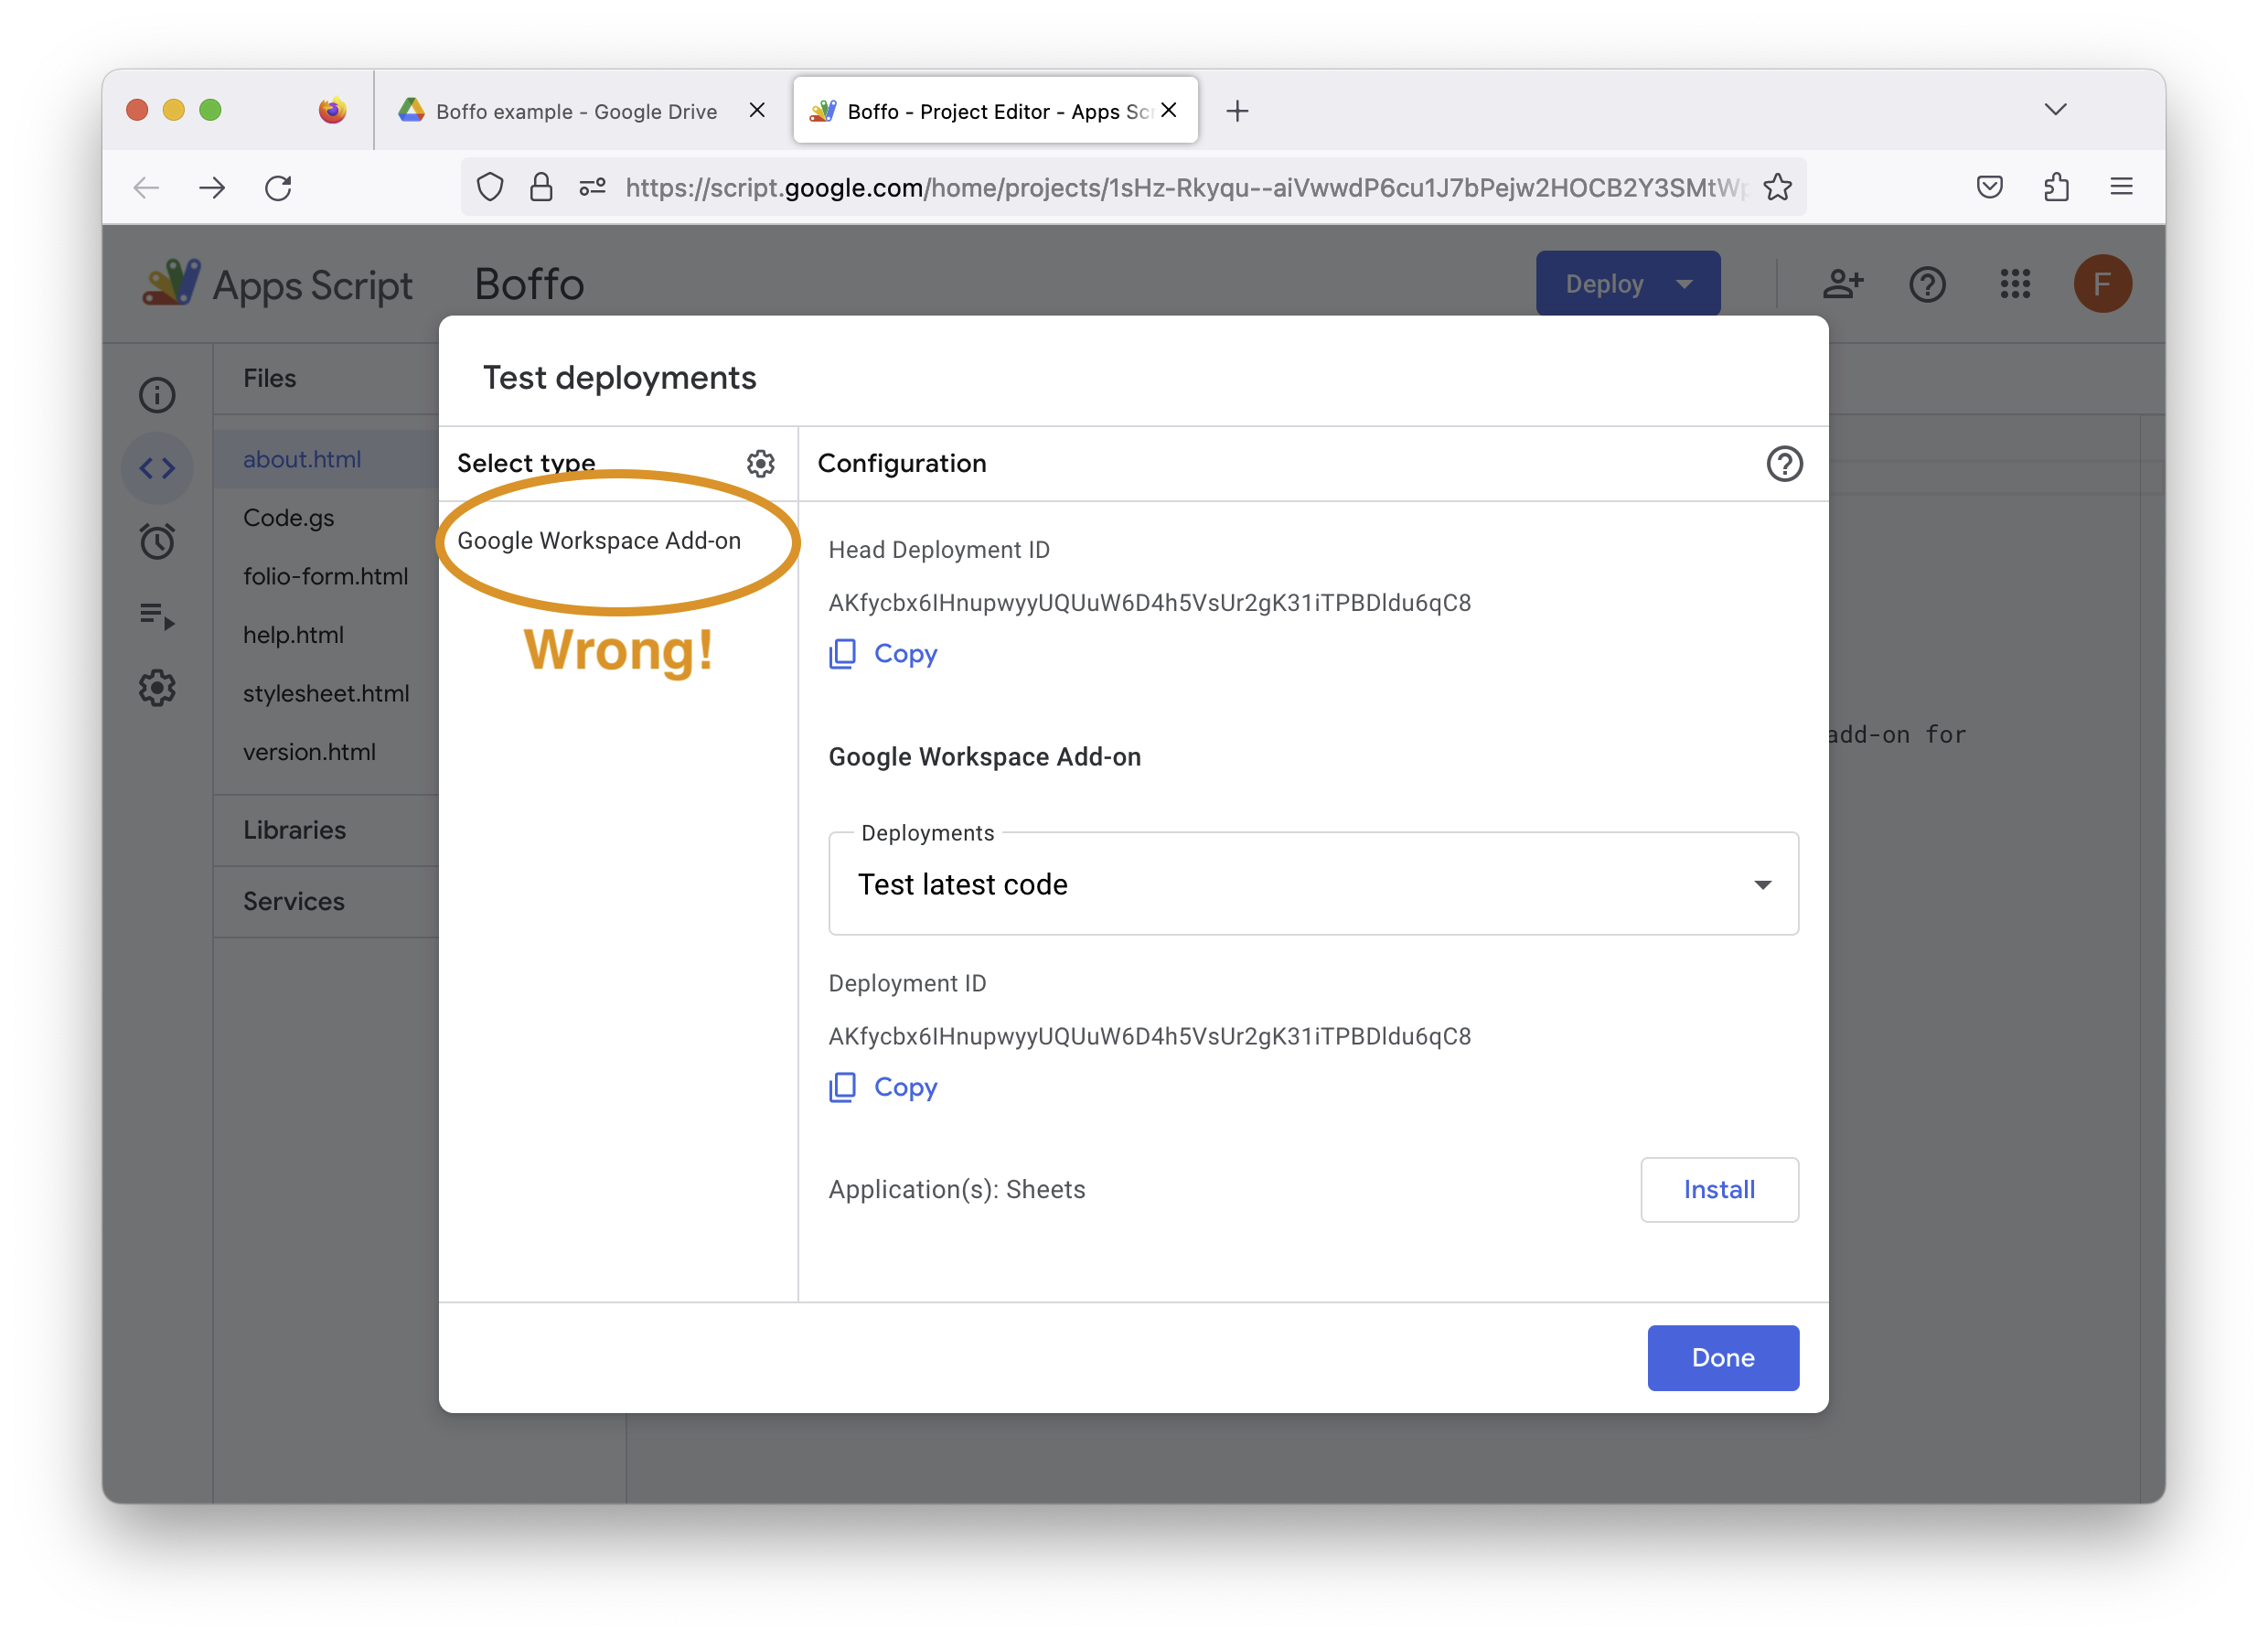
Click on the blue Deploy button at the top of the page, and select Test deployments from the pull-down menu.
In dialog that opens next, note the list in the left-hand sidebar shows the item titled “Google Workspace Add-on” as the default. This is the wrong deployment to use for our purposes.
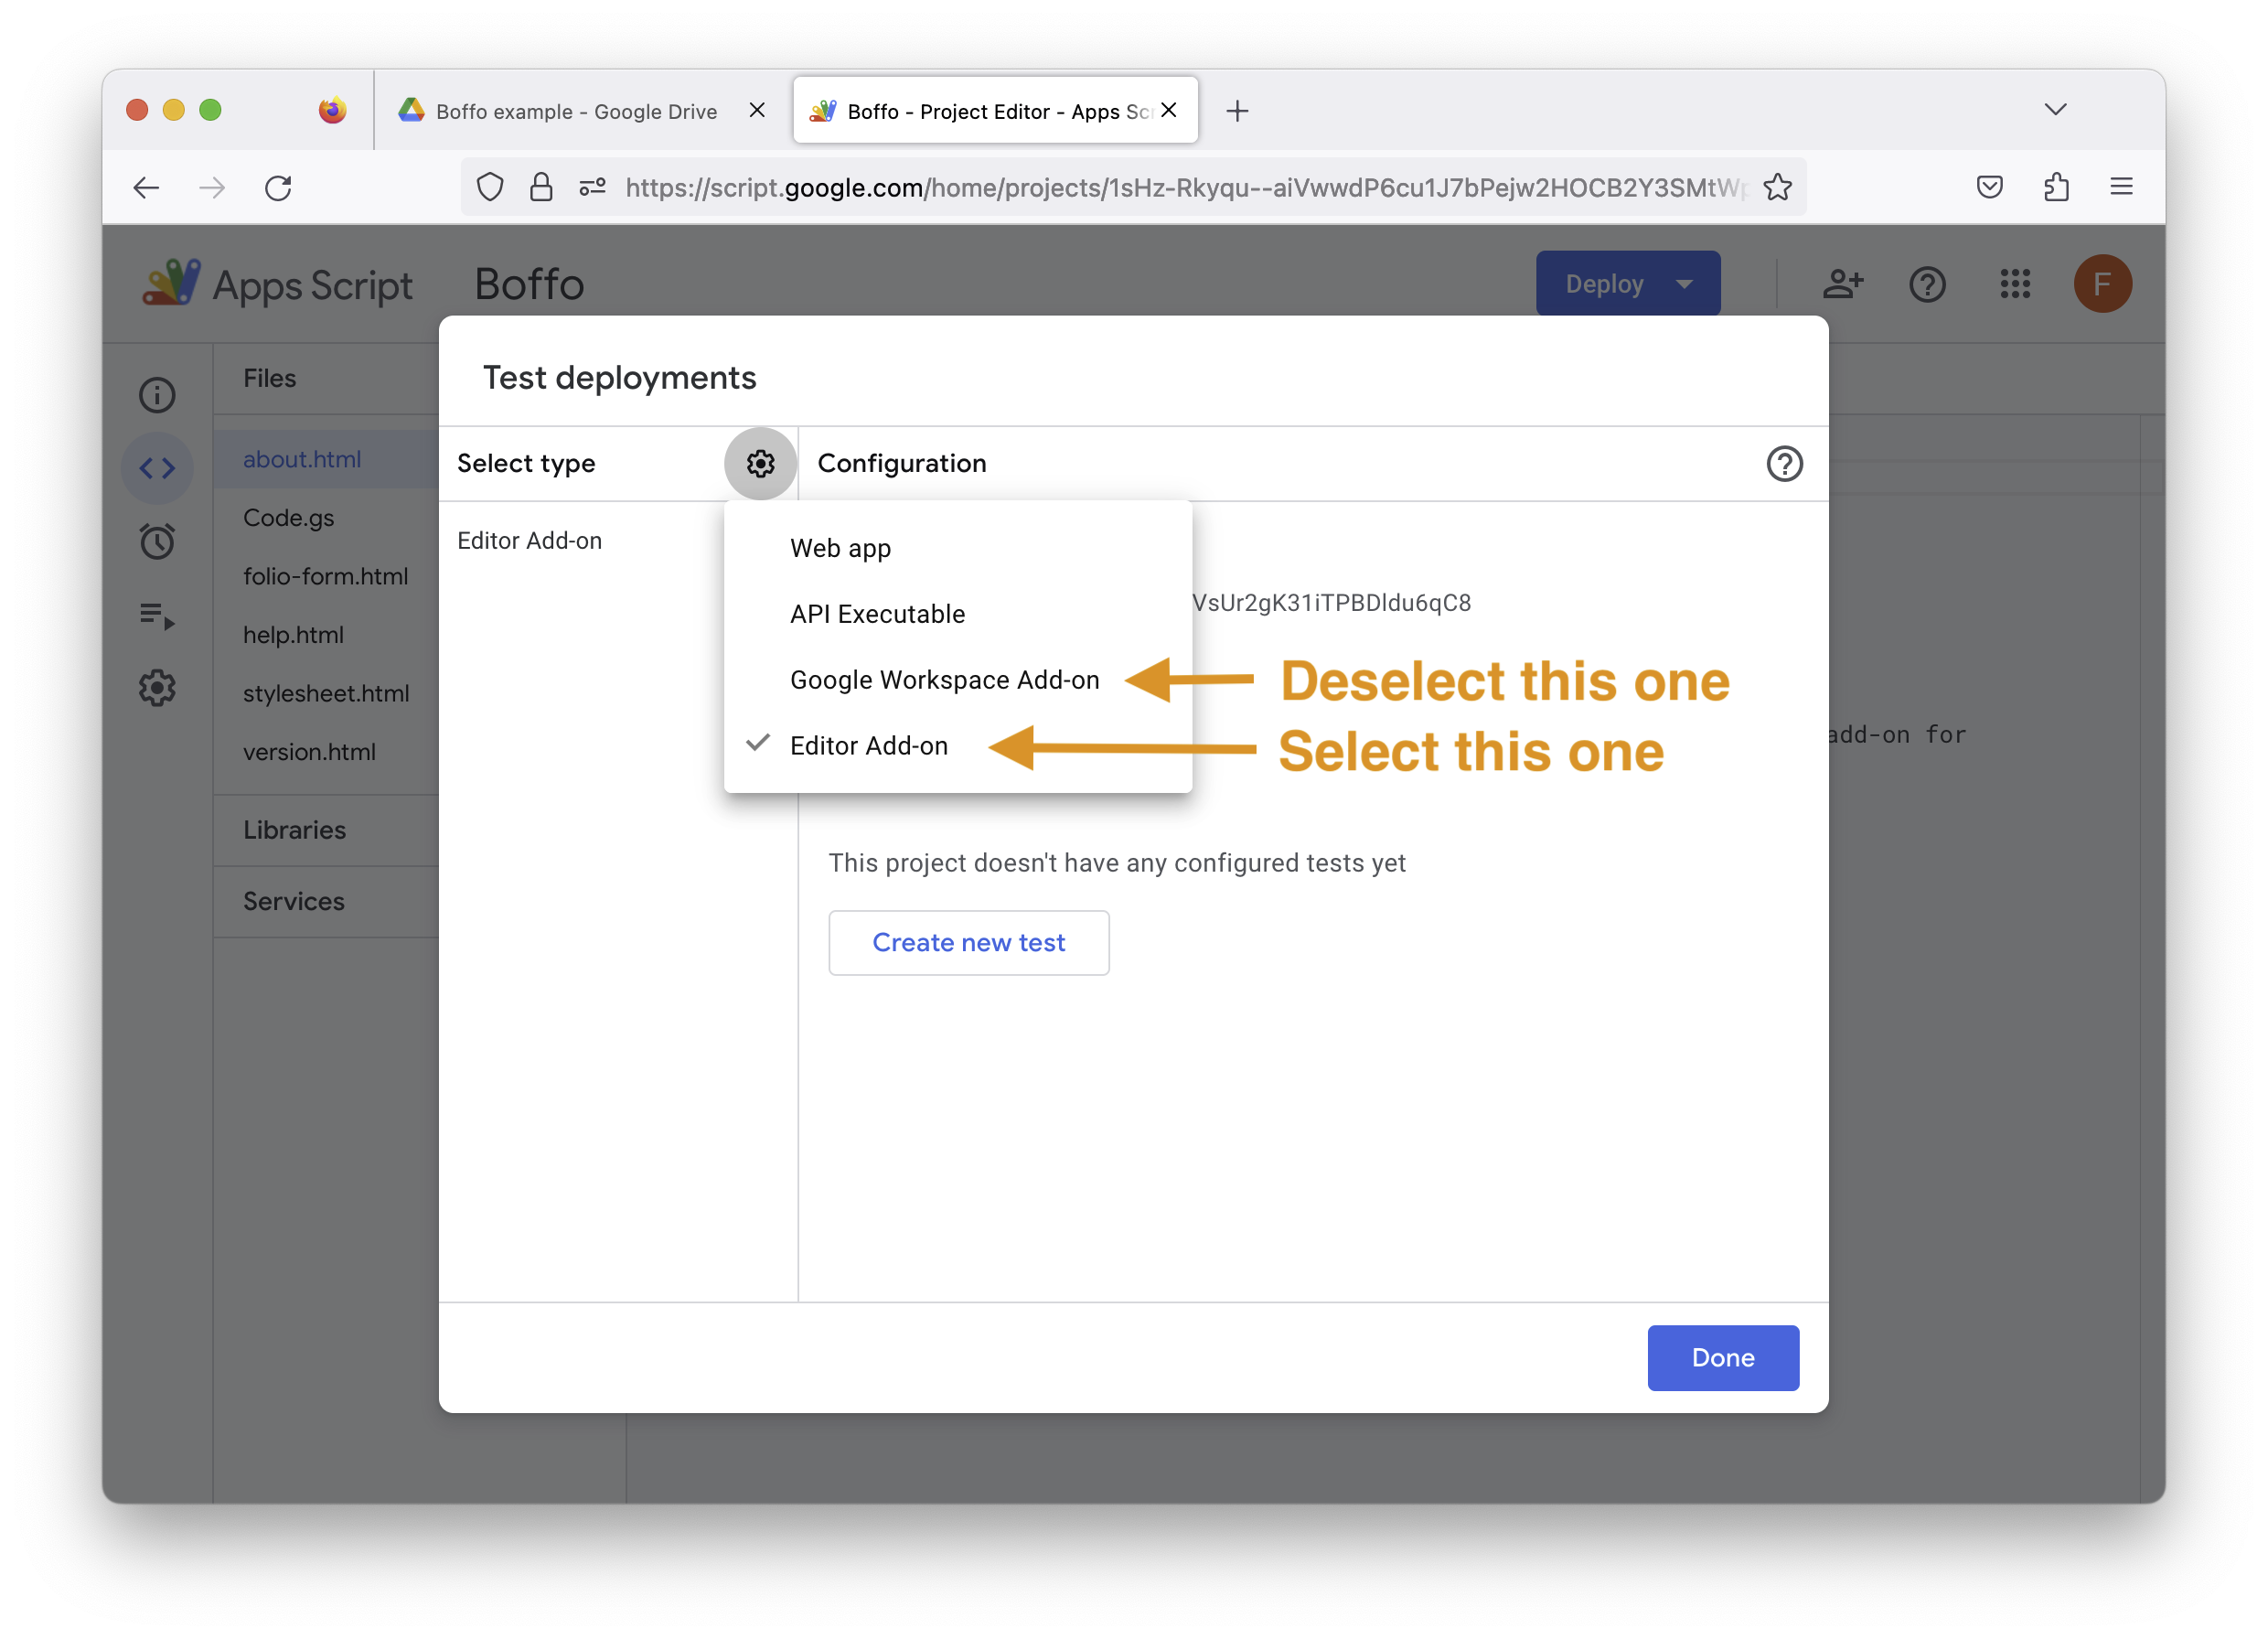
Changing the deployment takes two steps. Click the gear icon next to Select type and a pop-up menu will be shown. In this pop-up, you will initially find a check-mark next to the item “Google Workspace Add-on”. Select it to uncheck that item. The pop-up will disappear; click on the gear icon a second time, and now select the item titled “Editor Add-on”. You should end up with the configuration shown in the screenshot below.
With the configuration changed to “Editor Add-on”, click on the button Create new test,

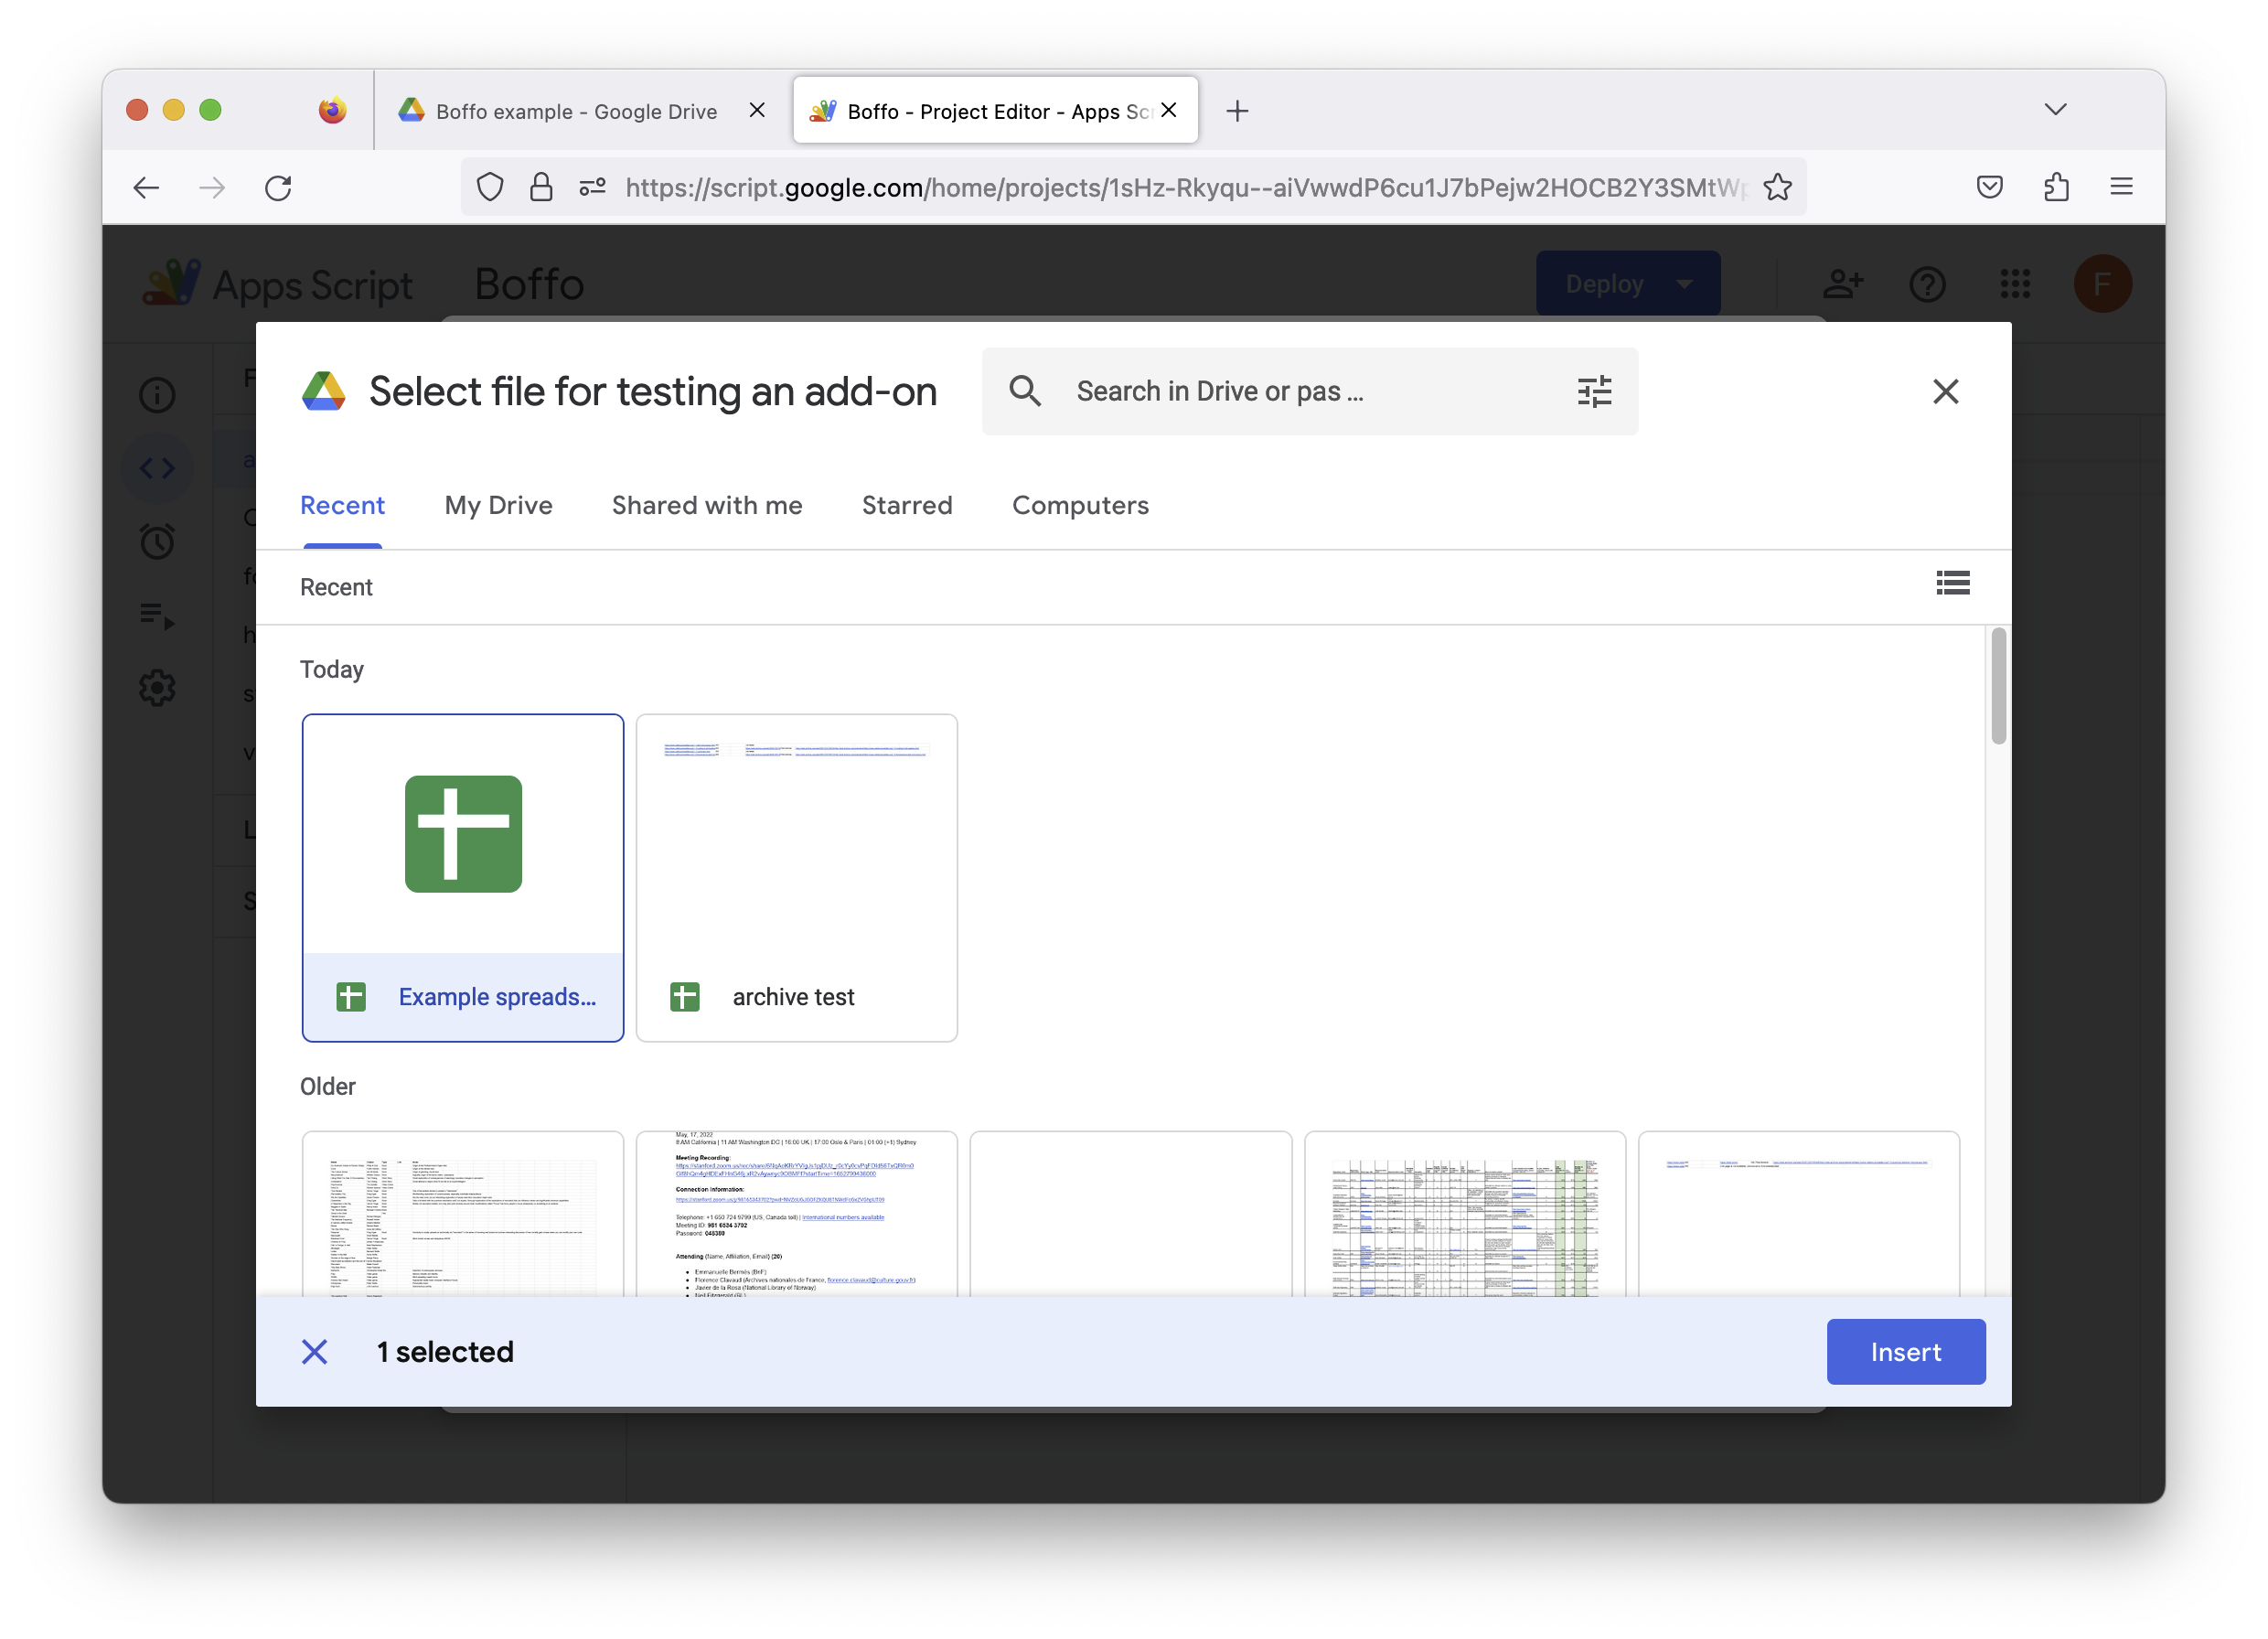
In the dialog that pops up, click on the up arrow icon in the 3rd field (where it initially shows “No document selected”).

In the Google Drive selection dialog that is shown next, select the spreadsheet created in step #8 above. and click the blue Insert button in the selection dialog.
The selection dialog will close, and back in the test deployments dialog, click the blue Save test button.

We’re not done yet! The deployments dialog will change, and now will look like the screenshot below. Click the circle next on the line with the name of the spreadsheet you selected.
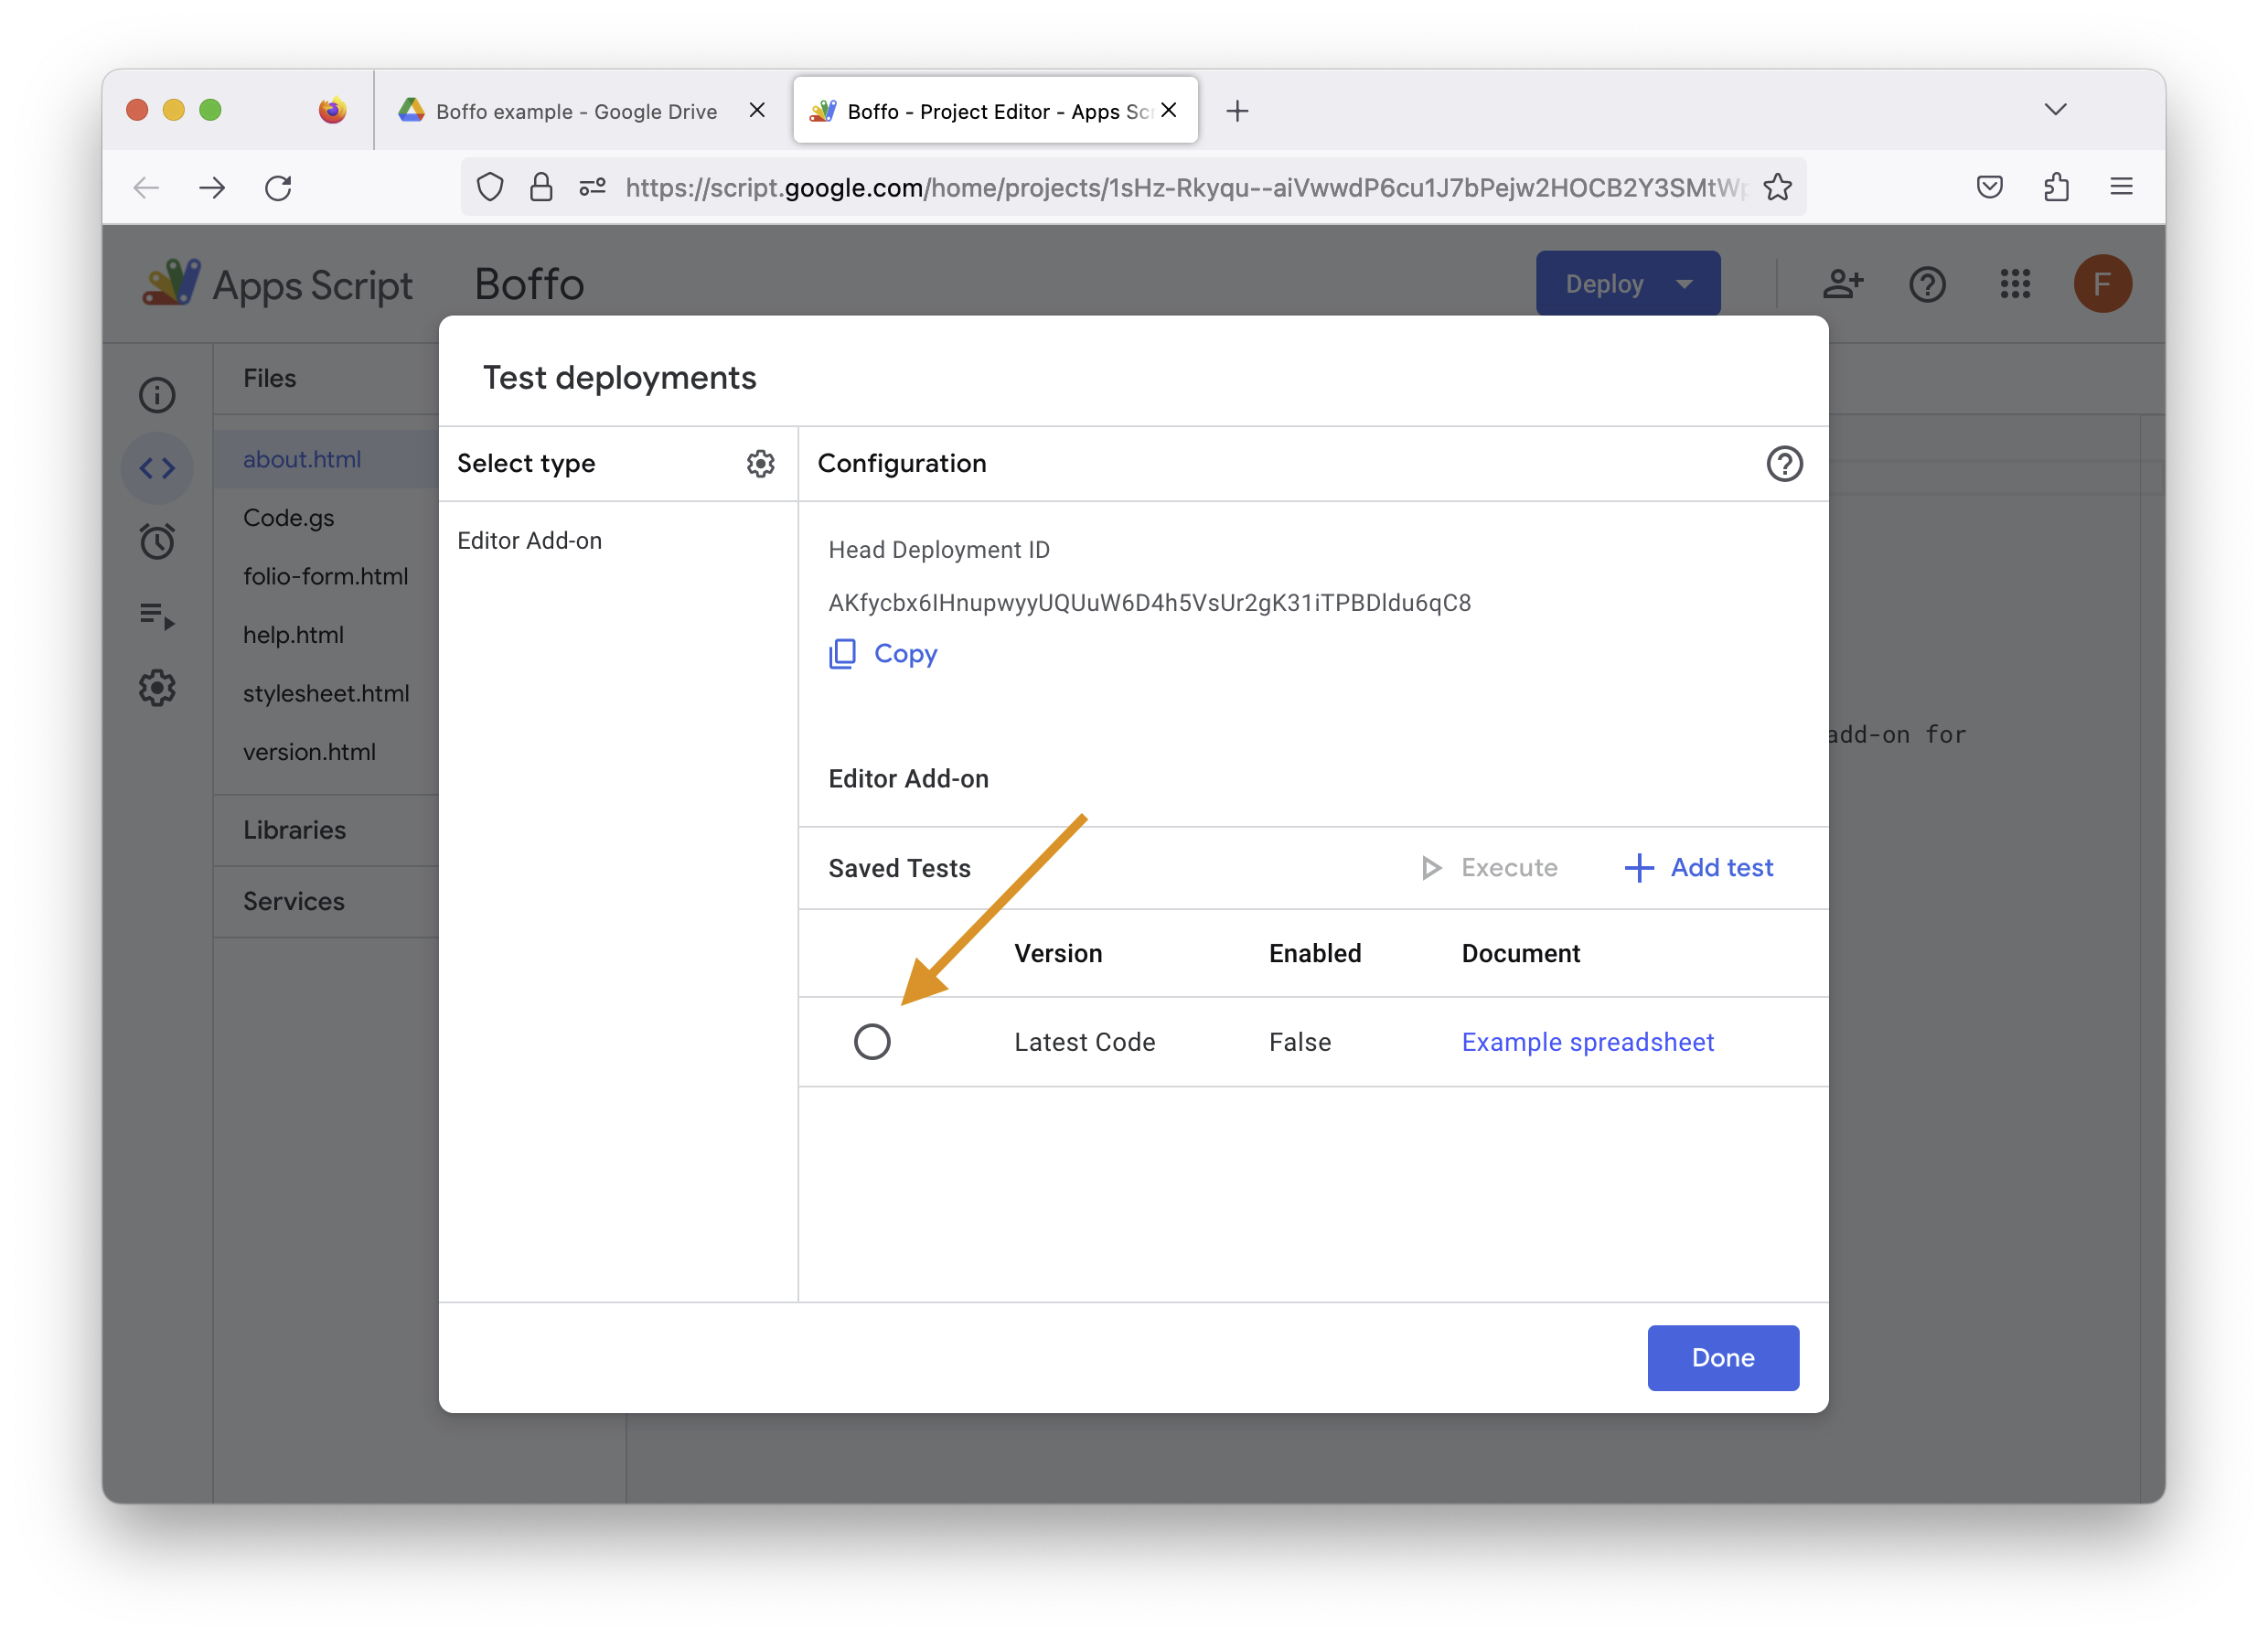
Now click on the blue word Execute which will become active as a result of clicking the circle in the previous step.

In an exciting development, the deployment dialog will close and your spreadsheet will open in a new tab or window in your browser. Click on the Extensions menubar item …
… and here, finally, Boffo’s menu will be available in your spreadsheet. And it took only 20 steps to get to this point. Easy, wasn’t it?
Using clasp to push source files to a GAS project
If you are comfortable with using command-line tools and GitHub, and perhaps want to change Boffo or use it as a starting point for other projects, you can follow the process described next.
Clone the GitHub project for Boffo to a local directory on your computer, if you have not already done so.
Install the command-line utility
claspif you do not already have it. It lets you maintain your Google Apps Script project files in GitHub and edit them locally, and push them from your local computer to a Google Apps Script project.Create a new Google Apps Script project in your Google Drive.
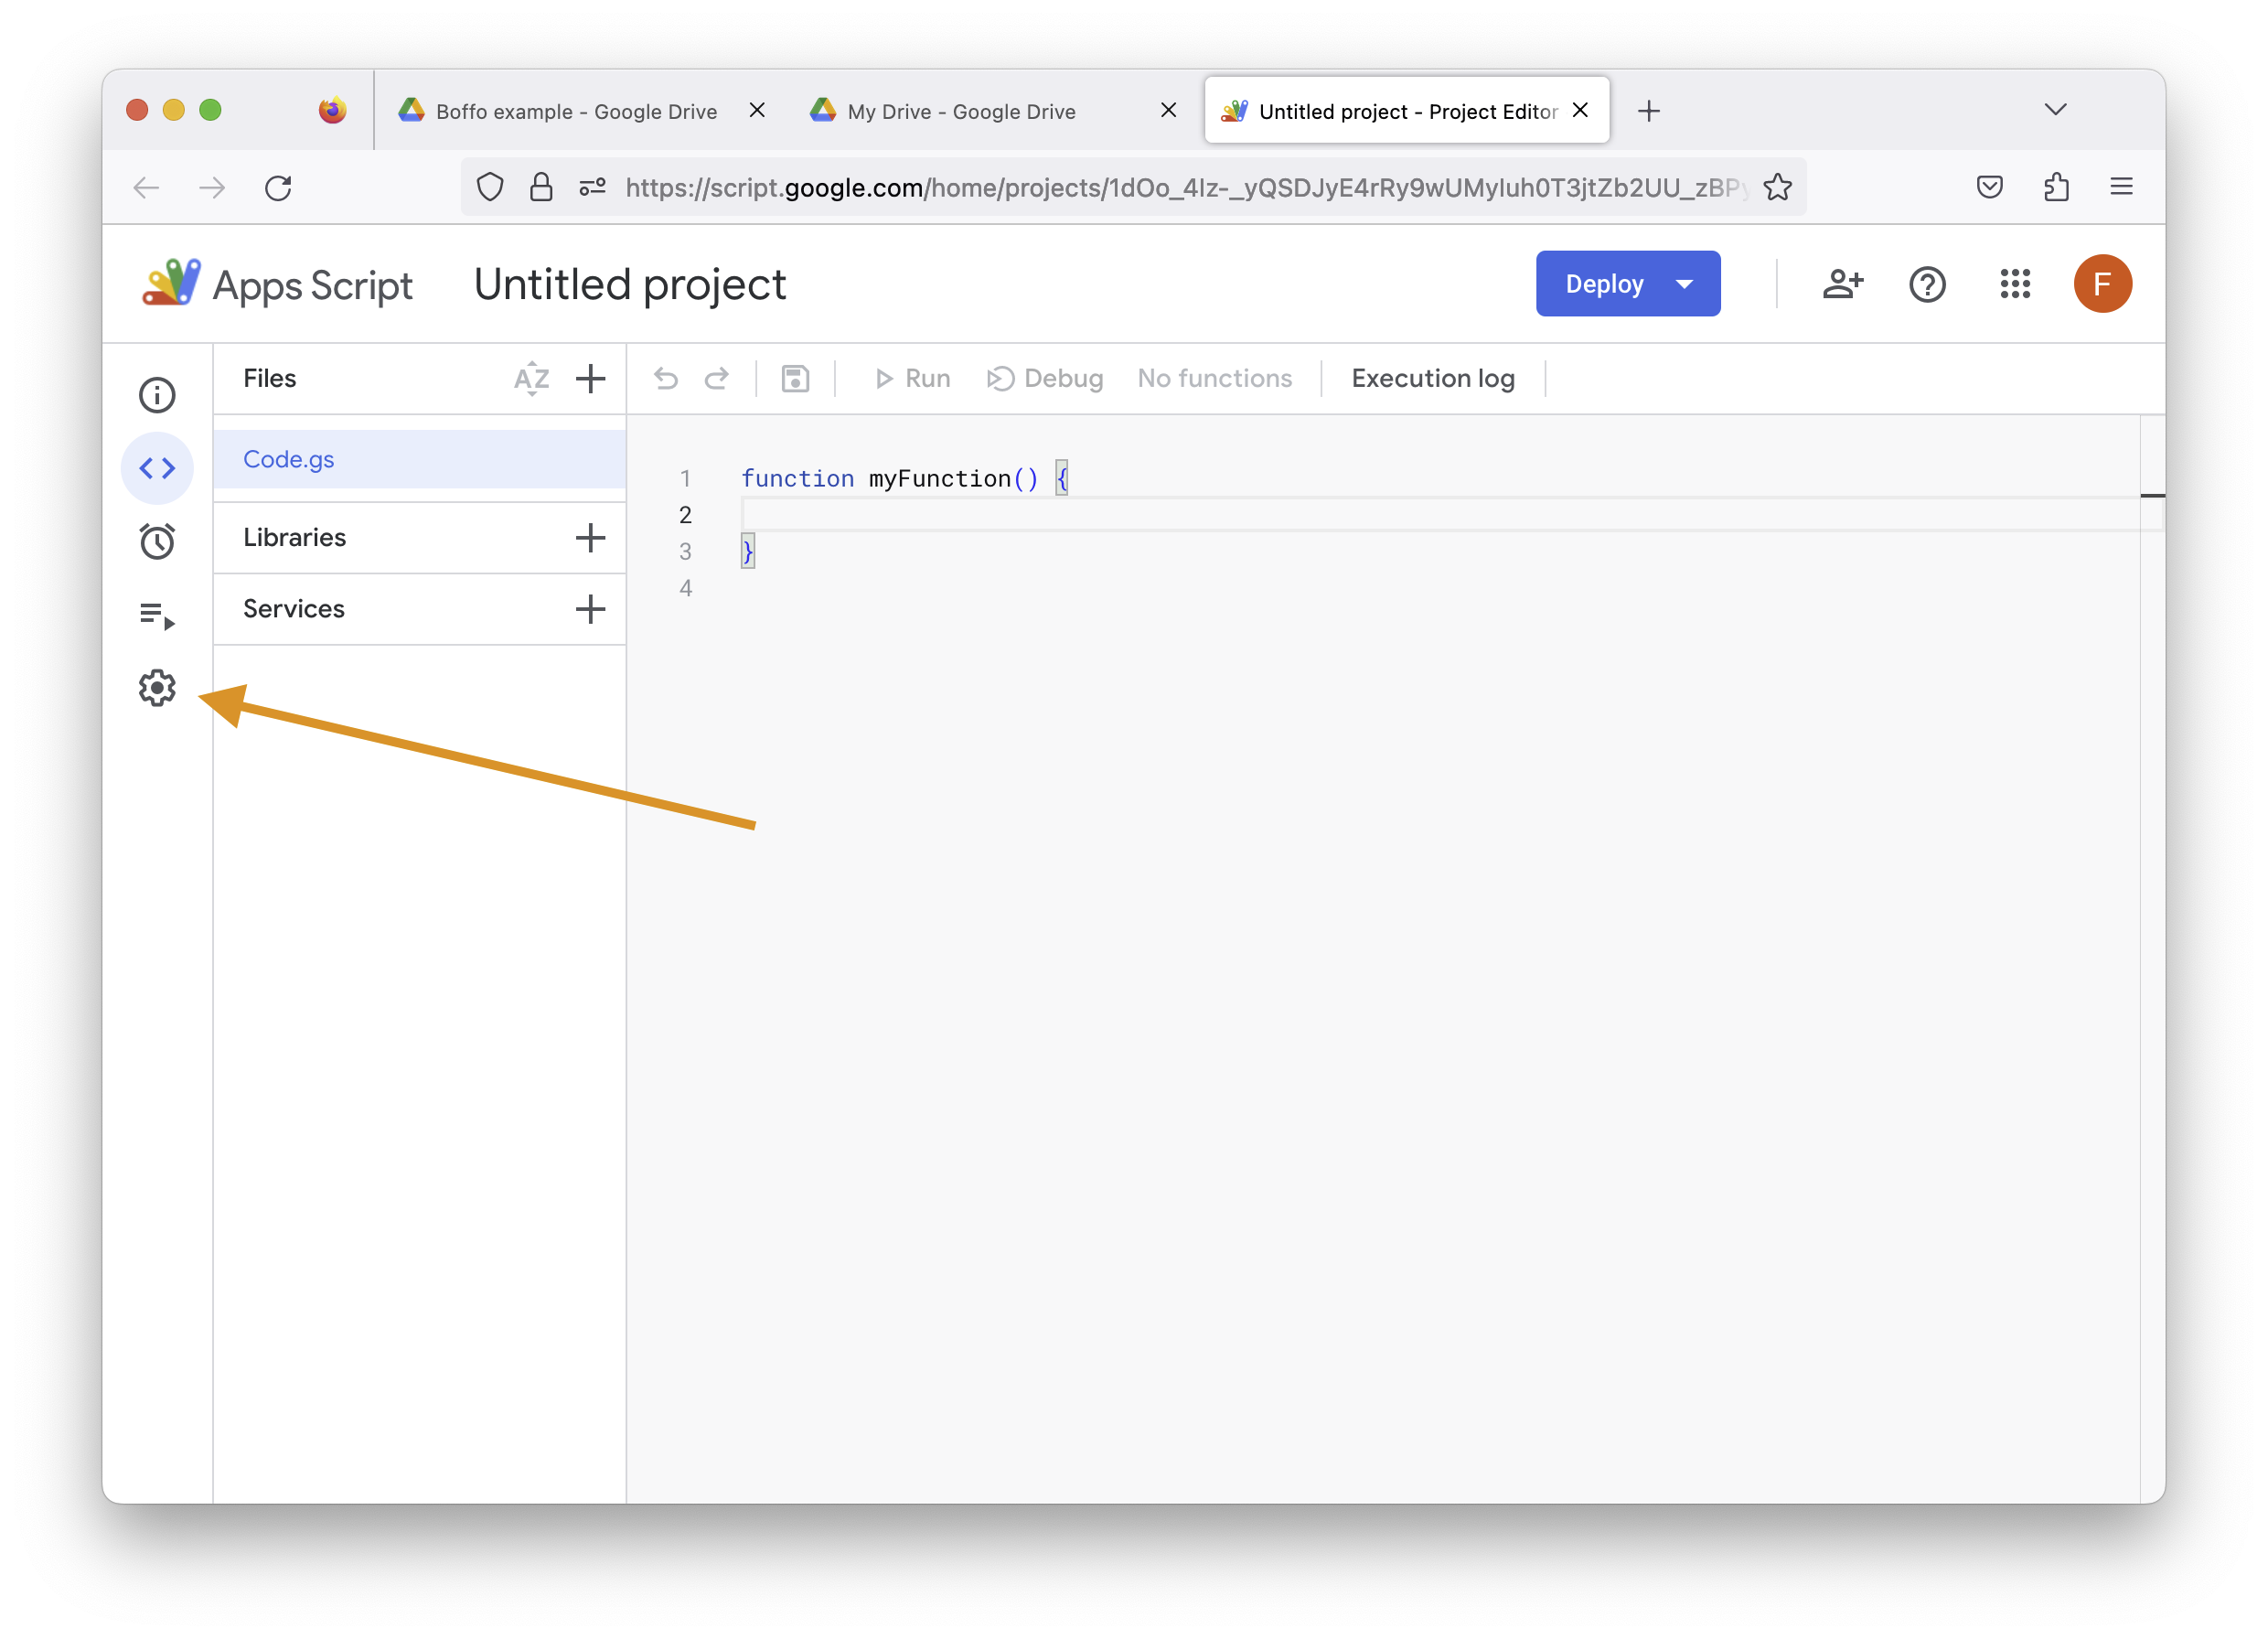
In the Apps Script project interface for this newly-created project, click on the gear icon in the left-hand column.
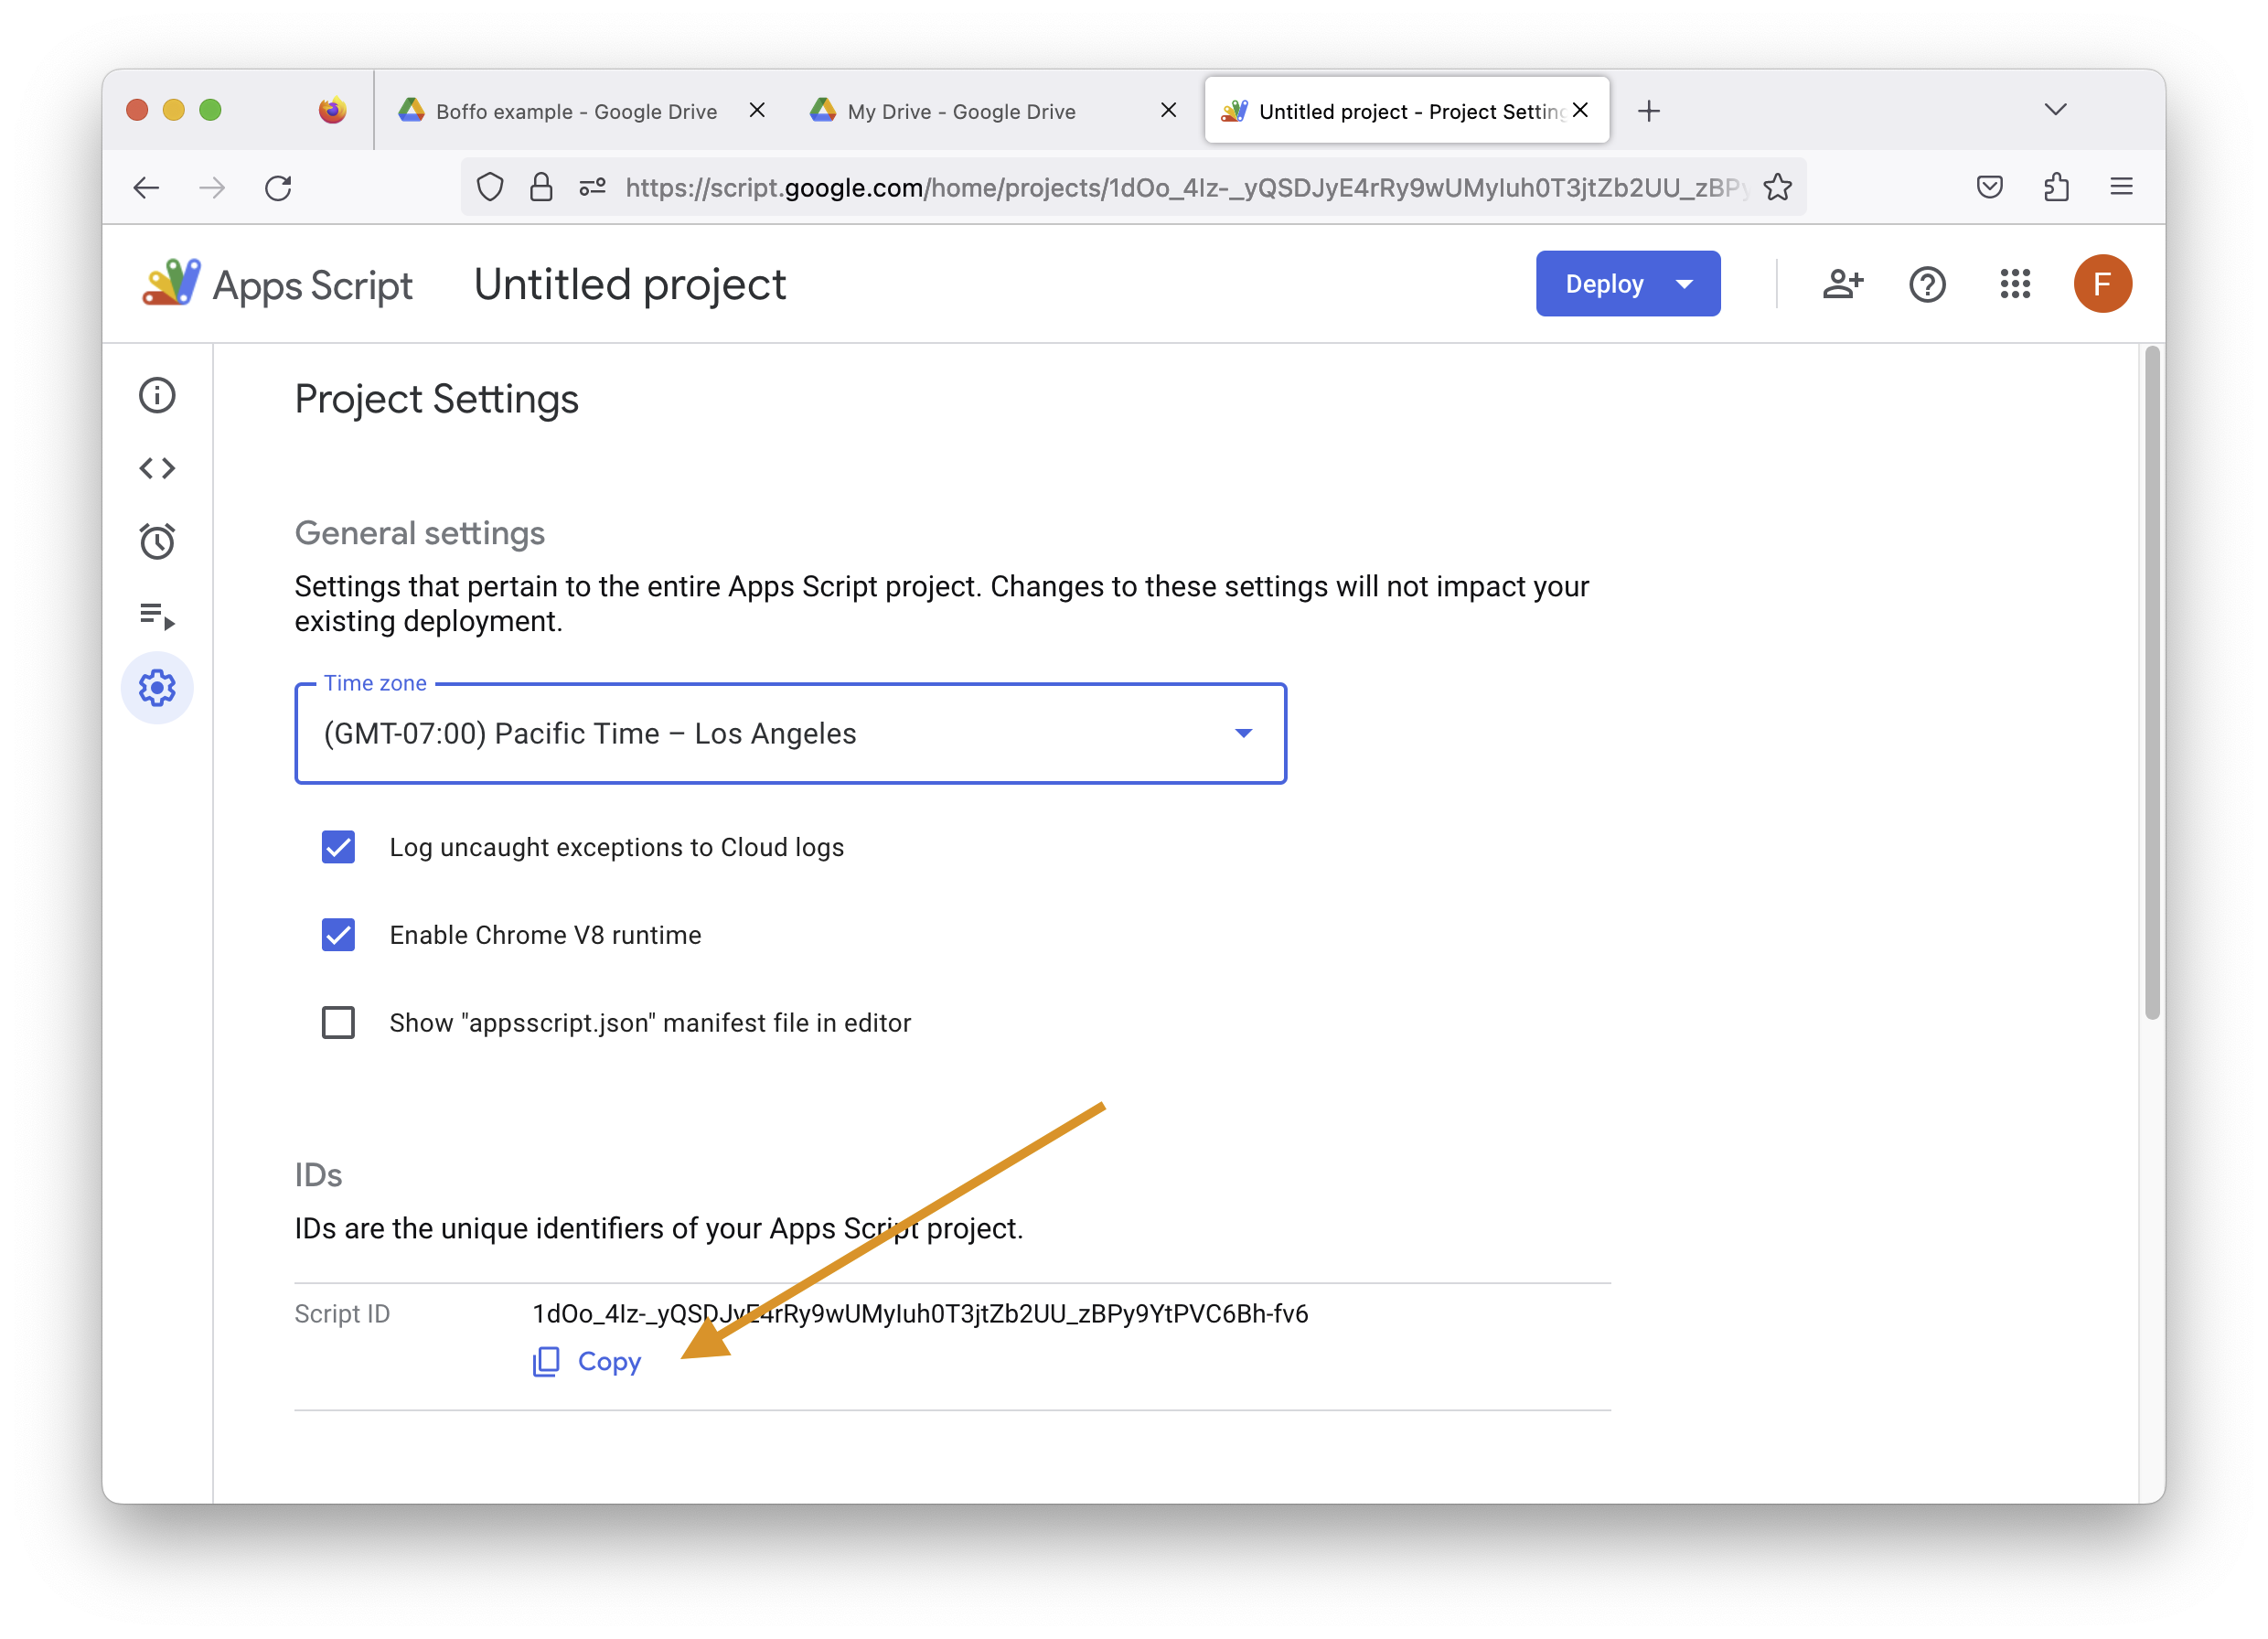
From the project settings page, copy the Script ID.
In your local clone of the Boffo repository, open the file
.clasp.jsonin a text editor, and change the value of the fieldscriptIdto the value you copied in step #5. For example, if the value you copied was1hio_6Izyd4908yE4rRy9wUjyIuh0z3jtxy2bb_zBPy9YtPVC6Bh-fv7, you would change the contents of.clasp.jsonto be{"scriptId": "1hio_6Izyd4908yE4rRy9wUjyIuh0z3jtxy2bb_zBPy9YtPVC6Bh-fv7"}
Now run
clasp pushto push the Boffo source files to the (empty, freshly-created) Google Apps Script project:clasp pushGoogle will ask you to authorize the transfer. Follow the directions to do so.
After this process, you should end up with a copy of the Boffo source files in your Google Apps Project. From there, you can edit the application as well as deploy the new version in your spreadsheets by following a process similar to the one described in the previous section.