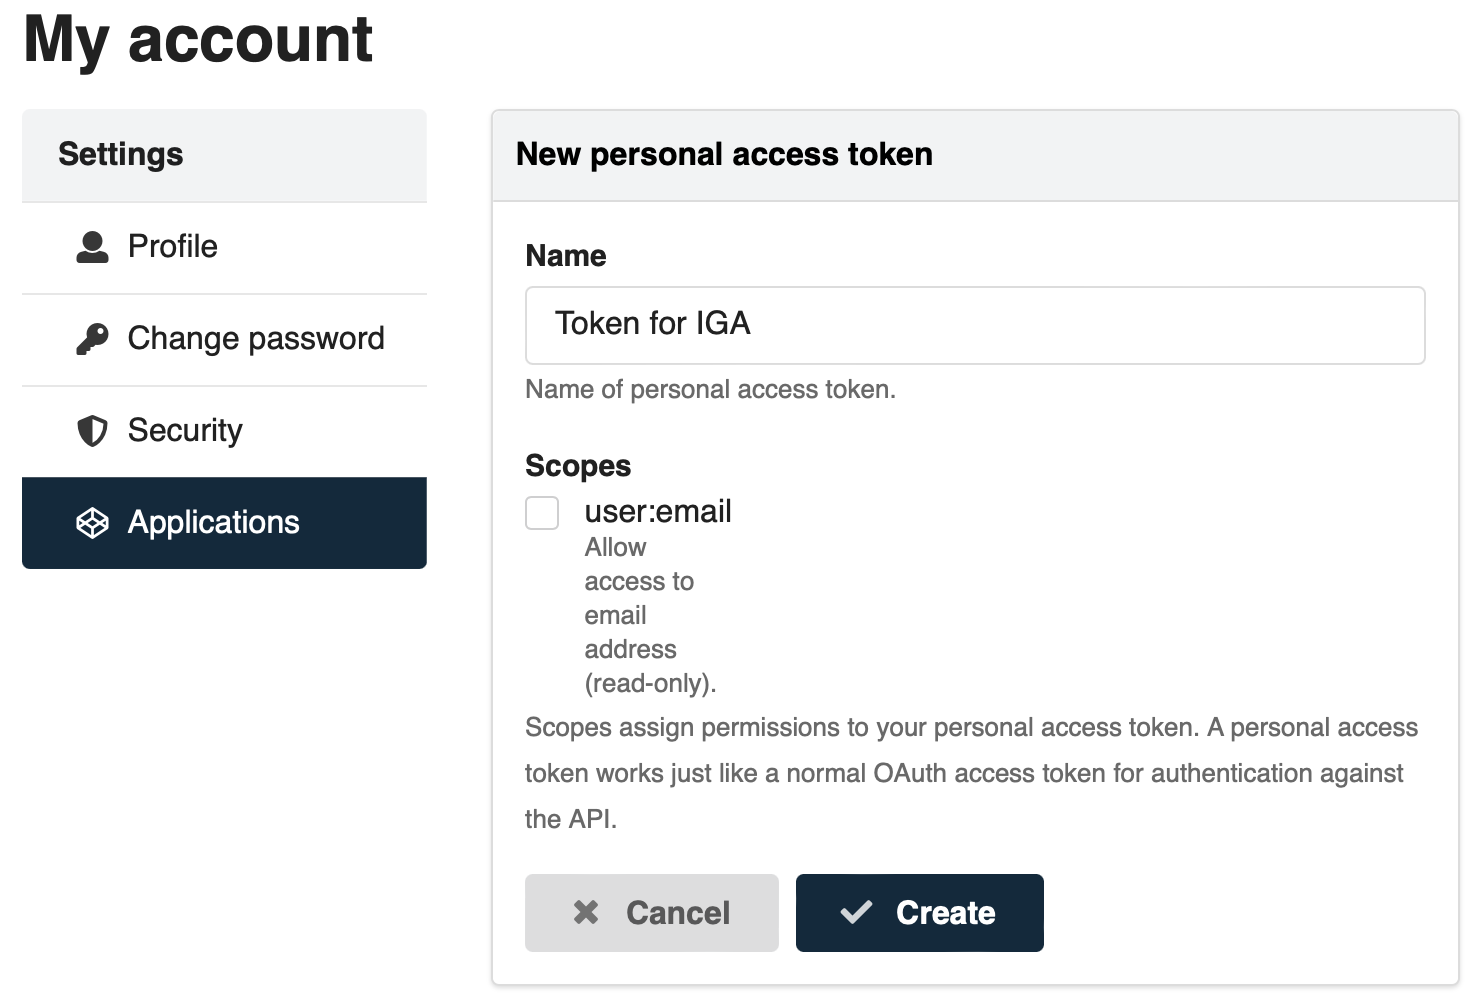
No matter whether IGA is run locally on your computer or as a GitHub Action, in both cases it must be provided with a personal access token (PAT) for your InvenioRDM server. Getting one is the next step.
The identity of the GitHub release is always given as an argument to IGA on the command line; the remaining values can be provided either via command-line options or environment variables. One approach is to set environment variables in shell scripts or your interactive shell. Here is an example using Bash shell syntax, with fake token values:
Once these are set, use of IGA can be as simple as providing a URL for a release in GitHub. For example, the following command creates a draft record (the -d option is short for --draft) for a certain project in GitHub and tells IGA to open (the -o option is short for --open) the newly-created InvenioRDM entry in a web browser:
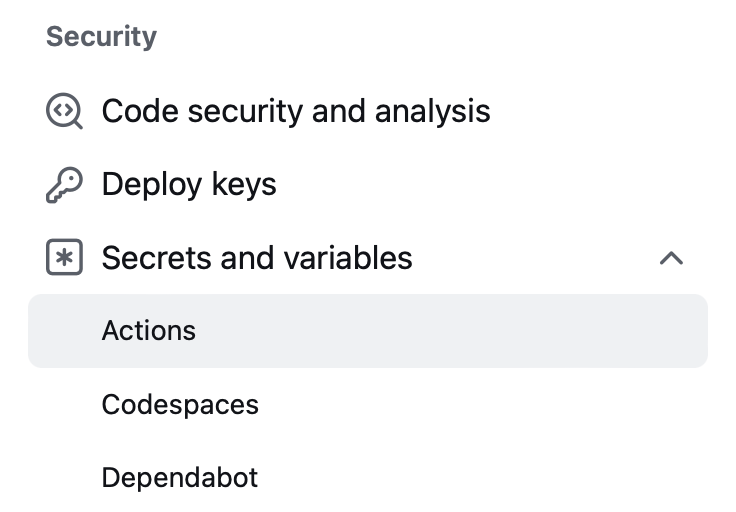
In the left-hand sidebar, find Secrets and variables in the Security section, click on it to reveal Actions underneath, then click on Actions
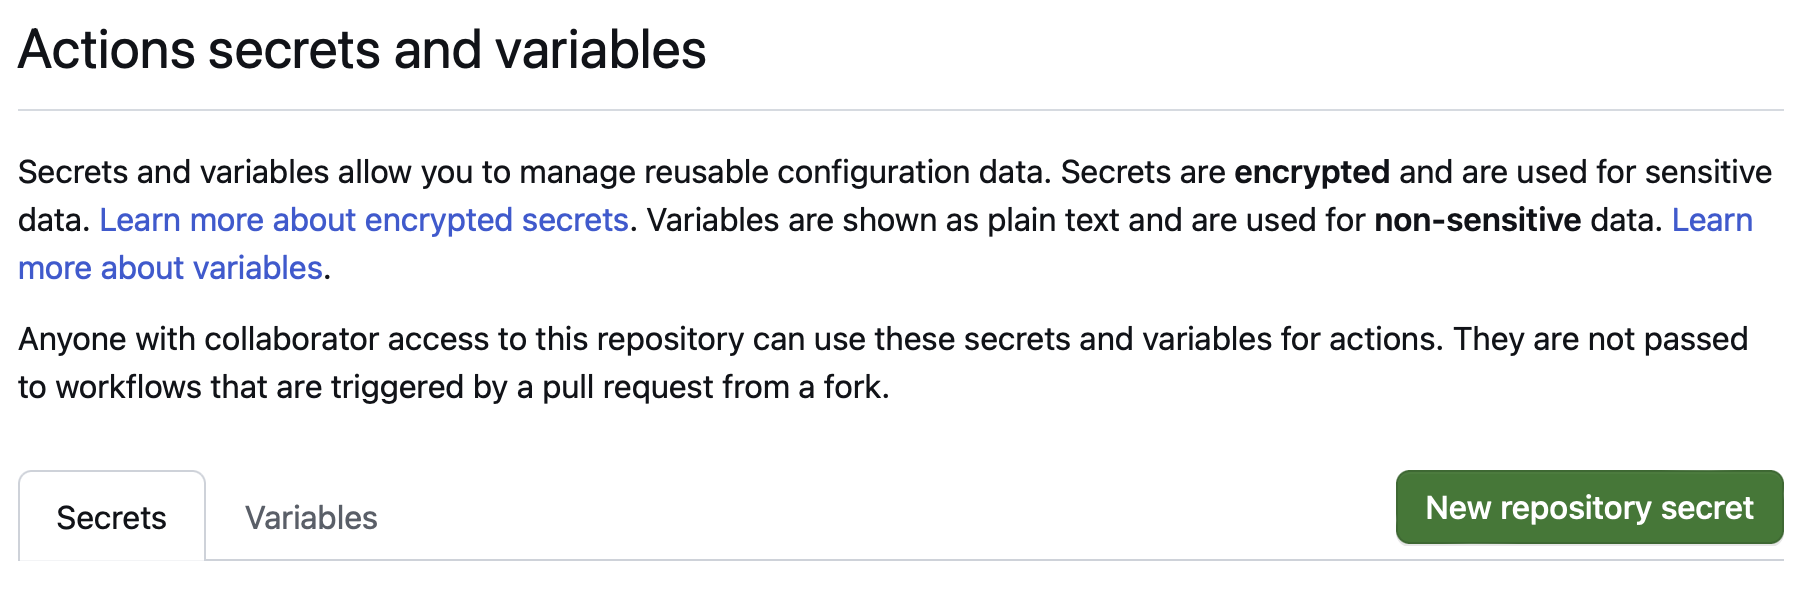
In the next page, click the green New repository secret button. Alternatively, if you are part of a GitHub organization you can add a secret for all organizational repositories by clicking the gray “Manage organization secrets” button.
Name the variable INVENIO_TOKEN and paste in your InvenioRDM token
After setting up the workflow and storing the InvenioRDM token in your repository on GitHub, it’s a good idea to run the workflow manually to test that it works as expected.
Go to the Actions tab in your repository and click on the name of the workflow in the sidebar on the left
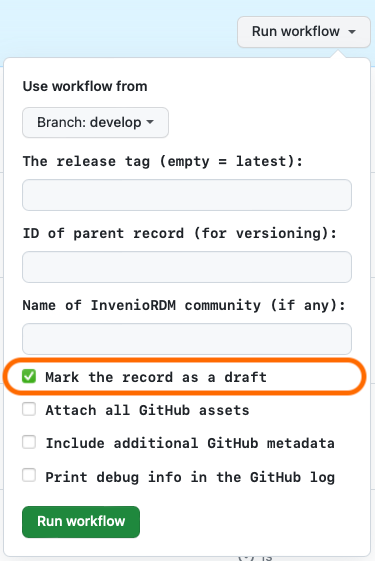
Click the Run workflow button in the right-hand side of the blue strip
In the pull-down, click the checkbox for “Mark the record as a draft”
Click the green Run workflow button near the bottom
Refresh the web page and a new line will be shown named after your workflow file
Click that line to see the IGA workflow progress and results
Once the personal access token from InvenioRDM is stored as a GitHub secret, the workflow should run automatically every time a new release is made on GitHub – no further action should be needed. You can check the results (and look for errors if something went wrong) by going to the Actions tab in your GitHub repository.
Once you’ve made the first release of your software on InvenioRDM, you might want to add the record you created as a ‘parent’. This will enable automatic versioning, so all your software versions will be listed in one place and users will be notified about newer versions of the software. Grab the record id at the end of your InvenioRDM record (e.g. 6qhkm-7n074) and add it to your iga.yml file in the parent_record field.